Up next in 10

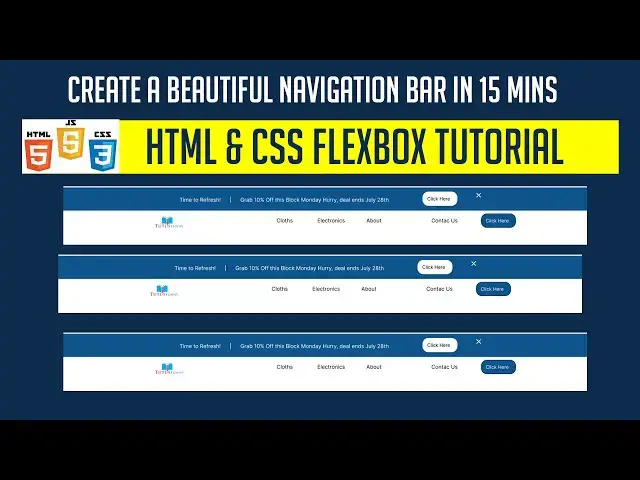
Create a Beautiful Navigation Bar in 15 Mins! | HTML & CSS Flexbox Tutorial
🚀 Master HTML & CSS in Just 15 Minutes!
Want to build a modern, eye-catching navigation bar? In this quick HTML CSS tutorial, I’ll show you how to create a responsive navbar using CSS Flexbox—perfect for beginners and pros looking to sharpen their skills.
🎯 What You'll Learn in This CSS Tutorial:
✅ How to structure your navbar with HTML & CSS
✅ Styling your navigation bar to make it stand out
✅ Using CSS Flexbox to align menu items like a pro
✅ Tips to make your navbar responsive and beautiful
🔧 No more boring navbars! Whether you're new to HTML CSS or brushing up your skills, this step-by-step CSS tutorial will help you build a professional-looking navbar FAST.
👉 Don’t forget to LIKE 👍, COMMENT 💬, and SUBSCRIBE 🔔 for more HTML CSS tutorials and web development tips!
#HTMLCSS #CSSTutorial #cssflexbox #HTMLCSSTutorial #FrontendDevelopment #htmlcsstutorial #cssflexboxtutorial
Show More Show Less View Video Transcript
0:00
Hi friends, welcome to tutors funny
0:02
channel. Today I'm going to teach how to
0:04
make the this web template using
0:09
HTML CSS box. Okay. Okay. This is the
0:12
header template. You can see this is
0:14
very important stuff while you are doing
0:16
the web pages, right? So let me do this
0:19
one in simple
0:23
15 minutes. So I'm not going to do very
0:27
fast. So if I do it very fast you you
0:29
are not able to understand that. So here
0:32
first I'm going to go to create a new
0:34
file. So I go to the G drive. I'm going
0:36
to write a HTML project.
0:39
HTML project.
0:43
Here inside the folder I'm going to open
0:45
it cmd.
0:47
Type on the address for cmd. Press enter
0:49
key and open the command from you have
0:51
to type code space to open the VS code
0:53
editor. This is simple way to open the
0:55
VS code editor. Now I'm going to go to
0:58
create the HTML project. Very simple.
1:01
Click on this
1:03
icon index.html.
1:08
Right? So here hold on the shift key
1:10
down press one. You can get this mark to
1:13
implement the HTML standards. This is a
1:15
HTML 5 standard. Right? So simply you
1:18
have to write it over here.
1:21
So how to do this one in Figma to HTML?
1:25
So how to convert this one? Simply you
1:27
have to convert this one. This is this
1:28
is the desktop version. So you can see
1:30
how to simply first what I'm going to do
1:33
is I'm going to go to the new bar
1:35
section. You have to write the div one
1:37
new
1:39
open and close bracket. This one you
1:41
have to call as a new bar. What is it's
1:44
called as a new bar section.
1:47
The class you have to call as a new bar.
1:51
new inside that inside this new part
1:55
first you have to focus on how much how
1:57
many
1:59
items available. So here you can see
2:01
this is the we have called as one item.
2:04
This is one
2:06
right. This is second one. You can see
2:09
this second one. This is the third one.
2:11
We have a three items. This is the icon.
2:14
This is the one button. This is the
2:16
text. Right? So these are the three
2:18
item. First you have to focus on the
2:19
items. This is a must. This is a very
2:22
must. So how to separate the one? Very
2:24
simply you have separate one. You have
2:26
to put into three dives. You write two.
2:30
the short form three.
2:34
Okay. Now here what I'm going is first,
2:37
second and third. The first what I'm
2:39
going to do is I'm going to do the thing
2:41
is you have to make it as a three things
2:46
first
2:48
and second
2:50
30
2:52
because we have a
2:56
separate first
3:01
the first consist of three elements.
3:03
What are three three elements?
3:05
You can get them these three.
3:08
So three things you have to get. You
3:10
have to get then double click on it.
3:11
This one you have to type on it. So I'm
3:12
going to just copy and paste it. First
3:15
one is a
3:19
first one.
3:24
Second one
3:26
is the second one.
3:32
Third one.
3:42
third one
3:46
that's the thing you have right now
3:48
let's file save all if you are not yet
3:51
installed the
3:54
uh live server you can go to the
3:57
extension you have here you have to type
4:00
live server extension and you install
4:02
them here this one click on it and
4:04
install
4:05
After that you can live your project
4:08
anytime pretty simple right so after
4:11
that you right click and open the live
4:13
server you will be able to see the live
4:16
here it is a default now what I'm going
4:18
to see here after that we have do we
4:21
have to styling this one very simple
4:23
stuff to we have to style this one okay
4:25
after done the stuff we have styling
4:27
before we have styling everything you
4:28
have to write it this here this one
4:30
second one is a button you have to write
4:32
the button
4:36
This one should be click me. Click here.
4:41
After that third one is a icon.
4:46
Third div is a icon. Okay. The first
4:48
div, second, third div is icon.
4:52
There's no fourth view. Third is icon.
4:56
This icon you have to bring the brick
4:58
them. Just go simply
5:03
icon
5:05
8.com here.
5:11
Simply you write close.
5:23
This one.
5:25
This is a close icon. You can get that.
5:27
Get this one and just click on it.
5:33
But the color they g
5:41
this one you can get this one. This one
5:43
is good.
5:45
So color also you have to adjustment as
5:47
here as you have to select as a white
5:50
color
5:52
and make this one as a white.
5:55
Done. So white color. Now what I'm going
5:58
to see white color and I'm going to copy
5:59
this
6:02
uh link link to PNG.
6:05
Right. So back to our project to paste
6:09
on it. So you have to paste here the you
6:14
paste on it that you have right here
6:17
like you have to write image
6:21
C. You write like this and you paste on
6:23
it.
6:29
or this one. Let's check on it.
6:32
It's coming. But you can uh width and
6:35
height. You can adjust the width and
6:37
height. Width 100
6:43
height 50. Let's check on it.
6:48
It also 50. You can write 50. 850
6:53
because also too much you have to write
6:54
it here
6:56
20 and 28
7:01
it's everything's fine now that thing is
7:05
fine now let's do the styling part
7:07
that's the most important part of
7:09
program is styling how to make the
7:11
styling styling we have to do within the
7:15
page okay we have we are simple design
7:17
we are doing okay if a if it is the
7:21
entire website you can create the
7:24
separate file to maintain it. So don't
7:26
put into the entire website inside that
7:28
same HTML page we have to maintain with
7:30
the separate page. Okay. So this is the
7:32
simple we have a two section we are
7:34
going to add it so that we have the two
7:37
section we have included the same file
7:39
rather than we have created another one.
7:41
Okay.
7:44
Right. So so it is it is easy. Okay. You
7:47
have to do it. Right. So what I'm going
7:50
to first step you have to styling you
7:51
have to create the styling text after
7:53
that what I'm going to do is I have to
7:55
do the thing is simply
7:57
uh you have to write first one you have
7:59
a body tag
8:02
body open and close it here you have to
8:05
write margin
8:07
zero padding
8:12
second one
8:14
new bar
8:17
open and close it Right. To implement
8:20
the display flax, you have to implement
8:22
the flax box. This is very important
8:24
stuff. Justify container center. You
8:28
have to write justify container. You
8:30
have to make it as center.
8:33
You have to make it as center. You have
8:35
to need a center screen.
8:38
You have a padding
8:41
10.
8:42
Gap you have to make it as uh 50 gap.
8:47
Let's check
8:49
background color. We have some
8:53
this background color.
8:57
I I focus on this background color. I'm
9:00
going to focus on this one.
9:05
Uh this color. So I click on it.
9:11
Color.
9:13
This color code. Copy. Back to your
9:16
project. You put it here along with the
9:18
ash then only the color should be
9:20
applied otherwise it it won't apply. Tap
9:22
it to put it. After that this one should
9:25
the background color. This one should be
9:26
the our
9:28
uh text color should be white. So let's
9:31
control S to save all and bring back to
9:34
the application. Check here it's coming.
9:36
It's working again satisfy. So again s
9:38
by what happened
9:46
by another started
10:02
is starting a closet here is started
10:05
closet here we up right start that's a
10:09
problem
10:11
now it's okay see
10:13
make sure the design is going according
10:16
to the way you have to check it whether
10:18
you are going the according to the
10:19
requirements okay that is uh what is the
10:23
design you have uh we have shown in the
10:28
Figma the same design you have to
10:30
implement that as well as HTML page okay
10:33
so you have to keep you have to observe
10:35
the design what is the design is going
10:37
on what is your design that's the best
10:39
sign if you the design is here it's
10:42
different you are going to code it's
10:44
different it's not good okay that is not
10:47
efficient way to do the program
10:49
ultimately the customer will be cancel
10:52
the project so the what is the designing
10:53
going on the same design you have to do
10:55
it right so then now it's we have to do
10:58
the things so this is the things I have
10:59
did it so so after that what I'm going
11:02
to do is we have to make the style okay
11:04
so what I'm going to do is that second
11:06
one. This is the second one. Second div
11:09
this div I'm going to make it as a
11:11
styling part. I'm going to make it the
11:14
styling part. So that uh uh we have to
11:17
do it here as uh first thing you have to
11:21
do it right. We have to make it as
11:22
implemented as a class
11:26
text.
11:28
Class text you have to implement the
11:30
class text.
11:31
text we have to going to do the thing is
11:35
here dot text
11:41
open close it first you have to display
11:45
flex
11:48
justify container center
11:50
[Music]
11:52
padding
11:55
10x
11:58
background color
12:01
[Music]
12:05
blue color.
12:10
After that color
12:15
white. So that background color need a
12:17
bit. This one should be the color should
12:19
be change as black.
12:23
Save.
12:27
Change this one. So background color as
12:29
this one as a so background color we not
12:32
need the background color only the this
12:33
one should be of white as white
12:38
it's okay it's working successfully it's
12:40
working according to the way uh so that
12:44
uh what it's going on that
12:48
uh div
12:52
by the text you have to make the three
12:55
elements why it's that uh gap proper is
12:57
not working.
13:02
Try that data.
13:29
Right. After that we have to design the
13:32
button. Button write button
13:38
text property. We don't have a gap. So
13:40
we have to give the gap here. You can
13:42
see here we don't have a gap.
13:46
Top right gap. There's a property called
13:48
gap.
13:51
Uh 20 pixel.
13:55
controllers to save. Bring back to the
13:57
application. Check here the gap is now
13:59
it's working fine. After that uh that
14:02
that is that would be fine. The second
14:04
one here this n bar also we have to lift
14:07
the gap. We need a gap also as well.
14:09
Here 30 pixel gap
14:13
we have gap. Okay. Simple gap over here.
14:16
Uh we are let's do the 50.
14:24
Okay, it's fine. The gap gap gap should
14:28
be fine. Now what I'm going to do is the
14:30
gap also the fine right. So if you
14:33
increase the gap you will be able to
14:34
increase the gap little bit here to
14:36
about uh 70.
14:39
Yeah it's possible here it's increase
14:41
the tap. Now we have done the things
14:43
well. Now what I'm going to after that
14:44
what I'm going to do is I want to do the
14:46
remaining stuff. Uh we have this this
14:49
this button should be coming uh middle.
14:51
So we have to do the button part. Okay.
14:54
So we have to do the button part as
15:01
okay. Now
15:05
the application you have to write button
15:08
simply button
15:10
because the button is already this
15:12
keyword
15:14
you don't need to type the button. So
15:15
button so button open and close bracket.
15:18
So you have to write the thing is
15:20
background
15:22
color of the button you have write this
15:23
color
15:27
this color you get them this how you
15:29
have get the color of the pig bar once
15:32
you're doing the design
15:35
get this one the color color is coming
15:38
here after that what I'm doing color
15:40
after that you have the color you have
15:42
the background color the color should be
15:45
act
15:51
padding
15:54
10 to 20 this one should be it is
15:57
meaning of top to left uh this one to
16:01
left to right so that's the padding so
16:04
border radius
16:06
border radius you write here 10 pix
16:10
that's it let's back to the application
16:12
it's working successfully it's working
16:14
successfully. We done the design
16:16
successfully. Right? So now here this
16:18
one this icon icon also we have to make
16:21
the change. So we have to icon uh icon
16:24
also we have to change this color. So
16:26
this color we have to make white coming
16:29
to white
16:34
img tag.
16:37
Let's check it tag
16:40
color
16:42
white. Let's check it.
16:45
Why it's not changing the color
16:51
here also you have write a property
16:53
called style
16:58
color
17:01
white you have to select this one
17:04
it's not so you don't worry about this
17:06
coloring so the color here this color is
17:08
coming here the color so white color
17:12
code here the color code white this
17:15
color code you have to apply it here
17:18
the color code now that bring to the
17:20
application here it's
17:23
okay first you have to think about that
17:25
that one it is it is we can not we have
17:27
to think about that one right so if it
17:29
is thing you'll be able to do things
17:32
perfect I hope you guys have done this
17:34
things well and next one I'll be going
17:36
to teach next tutorial thank you for
17:38
watching