Up next in 10

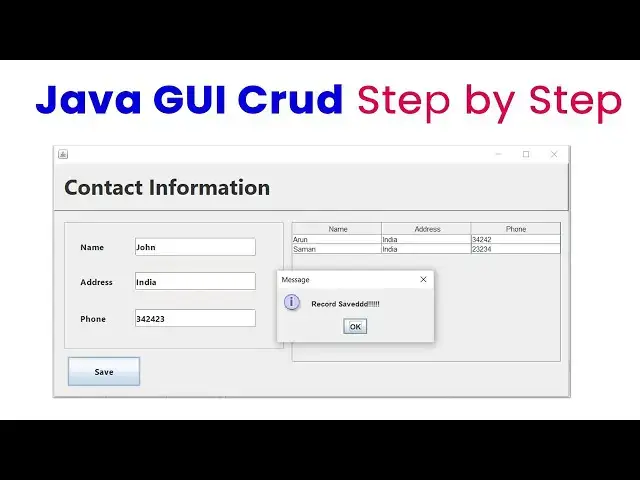
Java GUI CRUD Tutorial: Step-by-Step Guide for Beginners
Source code : https://www.tutussfunny.com/java-gui-crud-for-beginners/
#JavaProgramming #JavaGUI #CRUDOperations #JavaTutorial #ProgrammingTutorial #StepByStepGuide #LearnJava
Show More Show Less View Video Transcript
0:00
hi friends welcome to Tor funny Channel
0:03
today I'm going to teach you small uh
0:07
phone so you will be able to store your
0:09
details so here if you want to execute
0:11
the program here nice table here you
0:13
will be able to add the phone number so
0:15
you have to add the
0:18
uh for contact of John address
0:23
India number something like that click
0:25
save button you'll be able to save the
0:28
see last insert details would be sa okay
0:31
so how to make this system simple way so
0:35
first I'm going to go to file new
0:38
project Java and Java application click
0:41
next is Click create main class you have
0:44
to uncheck it I'm create
0:47
phone contact so contact
0:51
information
0:58
information you have wait until the
1:00
project has been created so here it's
1:02
created successfully now you have to
1:04
expand it here default package click
1:06
here Java frame from you have to create
1:09
here
1:12
phone hit finish
1:18
button now I'm going to design the phone
1:21
so I'm going to expand the frame little
1:24
bit bigger look like this
1:27
way let's drag the frame fro here
1:35
panel like this one right click new
1:38
project uh properties no border you have
1:40
to select the Border bevel click okay
1:43
close it now you have to track the
1:47
label this label I got
1:51
contact
1:57
information select this one
2:01
properties click on this bold
2:05
36 click
2:09
okay so you have
2:12
to just the size look like this
2:20
way so you if you want you just arrange
2:23
that like this way so what you're going
2:25
to do is now you have to draag another
2:27
panel
2:34
this P right click new properties no
2:40
border I think border okay now here I'm
2:44
going to go
2:47
to
2:50
label name
3:07
okay now here text
3:26
field 14
3:32
ready text backspace to remove the
3:35
select again change variable txt
3:42
name now here address and phone number
3:45
so select both contrl C to copy control
3:48
V to paste
3:52
here address
4:03
txt
4:08
address select work C to copy contr B to
4:11
paste here this one should be the phone
4:27
number so here simply you have to make
4:31
the info uh window look like this way so
4:34
here I need
4:35
one uh button which is a save button so
4:40
I just drag and drop it which is save
4:46
button you have to make this one as
4:52
save
4:55
properties b 40
5:02
now what I'm going to do is I'm going to
5:04
go
5:05
to drag one
5:12
table here you have to bring back to the
5:14
table over here this
5:16
one so if you need that splitter you
5:18
have to use the splitter as well as the
5:22
splitter SP
5:29
you don't need them at the moment so you
5:31
have to drag the
5:34
table
5:37
here just we need a record like
5:47
this okay now let's select this Frame
5:51
right click
5:54
properties
5:55
C generate
5:58
Center select the again
6:01
Source crl
6:03
F
6:09
UI right
6:17
matter run the
6:22
application it's working perfectly well
6:25
now let's select this
6:26
one table contain row select and
6:35
delete now columns I'm going to this one
6:37
first one should be the
6:42
name so you have to name this one should
6:45
the
6:46
address
6:50
one this one I just select this
6:55
one that's it okay perfect take
7:00
now what you're going to do is first I'm
7:02
going to make the
7:03
connection so what I did here is I
7:08
just I'm going to this connection I will
7:11
be explaining don't worry first I'm
7:13
going
7:16
to what you're going to this all things
7:19
for the designing so designing I just
7:21
this all no need I'm going to make the
7:25
first I'm going to make the first I'm
7:27
going to implement the SQL connection so
7:30
TQ collection
7:33
import Java
7:38
dot
7:40
SQL
7:42
dot this one so here we have write you
7:46
have to uh we have to add the name say
7:50
successfully now here I'm going to go to
7:52
add the connection property connection
7:57
F PR
8:02
statement
8:07
PST now here I just copy and paste this
8:10
code this code here first I'm going to
8:12
create the method this method I'm going
8:14
to create public white connect open here
8:16
close it here inside the method here you
8:19
have to no need to create this one all
8:21
things this is generated by
8:22
automatically okay you have write only
8:24
these two lines you can see here two
8:26
lines only you have to write first class
8:28
for name this is the driver we have t it
8:31
into MySQL driver this is the where your
8:35
databas ised we have give the path okay
8:37
so we already created the database so
8:39
here Zam I already created the database
8:42
which name is phone book now you can see
8:45
the phone
8:53
book yes phone book I have created the
8:57
content this the database I have created
8:59
that this is the contact inside the
9:01
database we have created the contact
9:03
table name is contact okay this all the
9:05
table I'm going to all things I just
9:10
delete
9:12
them okay now I'm going to add the
9:14
details so you have to understand okay
9:16
so what I'm going is here I'm going to
9:18
go to the
9:20
design see we perfectly we designed the
9:22
form successfully this is this is the uh
9:25
code okay so first I'm going to
9:30
in order to connect MySQL and Java we
9:34
have to download the appropriate
9:36
connector which is
9:41
a
9:47
MySQL download
9:51
CH click on
9:57
this select the operating system is a
9:59
platform independent here the jar you
10:02
already downloaded here you have to
10:03
download it click and download okay so
10:06
if you have to download download and
10:08
after download it come as a zip folder
10:11
you have to unzip it okay you just right
10:14
click and you have to un okay un it it
10:19
come as a normal folder normal file now
10:21
after that you have to go to the
10:24
libraries folder I'm going to click on
10:25
this libraries package of the project
10:28
add your
10:34
folder you have to browse and upload it
10:37
here okay so already I did it okay you
10:40
have to browse and up it that
10:43
correct okay then now that it will be
10:45
added your project okay that's the thing
10:47
you have to write it so after that what
10:48
I'm going you have to add the method
10:50
connect okay so after that you have to
10:52
this driver is already here we have to
10:54
import it successfully on on our project
10:57
so I have to first I'm going to register
10:59
driver for how to register driver you
11:02
have to use class for name com MySQL CJ
11:06
jdbc driver you have register the
11:08
particular driver after that you have to
11:10
implement the database path where your
11:12
databas is resided my
11:14
databas which name is uh phone book this
11:18
is my database which is a phone book so
11:21
it is reside on where it will be resided
11:23
it resided on the
11:25
my okay this is the database this is
11:29
this is nothing but a database okay this
11:30
is the user credential of the database
11:32
MySQL which which is nothing but the
11:35
username this is a password blank will
11:37
be our password this simple way okay
11:40
here you don't need to do anything else
11:42
you click just click on
11:44
this surrounded the try and catch how
11:48
this all the things you just cut paste
11:50
inside that's it you don't need to write
11:53
anything else this not error this also
11:55
click on this add a catch close that's
12:00
it this is the beauty of the my uh
12:05
netbit so this connected whether you
12:07
database is connected or not how to
12:09
check it this connected method you just
12:10
copy paste inside the Constructor of the
12:13
class what is the Constructor
12:16
Constructor which is a method which has
12:18
the same name of the class name
12:20
Constructor which is a method which
12:22
which is a same name of the class name
12:26
when the Constructor is when the CL uh
12:29
when the project is running the
12:30
Constructor is done okay the first time
12:33
the Constructor is done so here now you
12:36
can check it whether it's working fine
12:37
or not you can just put it the system.
12:39
out. printer and check it whether the
12:41
connection is connected or not you have
12:43
to type system. out. printer we have
12:44
check it whether it's connected or not
12:46
we using this by command this command uh
12:49
print
12:53
n right
12:57
connector f you have to run run on the
13:06
project
13:16
connect double click on the save button
13:19
here I'm going to write the
13:27
command oh here I'm this is a simple
13:30
insert insert Cory so going I'm going
13:34
first going to go
13:42
to we already added the we have create
13:44
the
13:46
connection object con this is the this
13:50
we have this we
13:52
have this connection which we have to
13:55
create that this connection is reside on
13:57
the SQL class what is the meaning of
13:59
this one our connection is resided on
14:02
this connection object okay this is
14:04
connection the databases connection okay
14:08
after that we have to create the SQL
14:10
query SQL query we have to use to write
14:13
of the prepare statement so we we
14:15
already created the prepare statement
14:16
object pstd so what you're going to do
14:19
now first what you're going to do here
14:22
first these are the text fields we have
14:24
to assign into the particular variable
14:26
so first I'm going to create a string
14:27
variable string
14:29
name comma address both
14:33
are how that int which is a for
14:38
now so now we have wred name
14:41
equal txp name dot get
14:48
text how that
14:51
address
14:53
equal txt
14:56
address. get text
15:01
phone
15:03
equal here when you type the phone
15:06
number because this is a integer type so
15:08
what how to type it here this one is a
15:10
phone number you have type
15:12
integer
15:14
dot pass in here you write txt phone
15:21
dot
15:24
getex that's
15:26
it now you have try to insert code
15:29
so insert code to this
15:31
scor just copyed and P I will be
15:33
explaining okay so you write the prepare
15:36
statement object we already
15:39
created PST you have write PST equ con
15:43
object prep you insert into which table
15:46
I'm going to insert the
15:48
record we have a table in the database
15:53
which name is phone number phone book
15:54
inside the phone book we have a table
15:56
name content Conta table consists of
15:59
name address phone number so we have a
16:00
name address phone number so these are
16:03
the this is nothing but a parameter
16:06
this what's the name you entered over
16:09
here address entered and phone number
16:11
this all things assigned to this
16:13
particular variables the set into the
16:15
this all the value will be all on this
16:18
particular variables this all the values
16:20
we have to pass into here this
16:23
parameters set
16:25
string 1 2 3 we have a three values so
16:29
you have 1 2 3 these three values goes
16:31
to the respective parameters first value
16:34
goes to the name second value address
16:36
third value as a phone number so these
16:39
all things are set into the respective
16:42
columns the first value set it as a name
16:44
column second value set it as address
16:46
third value set it as phone number okay
16:49
this all the this also called as this
16:52
parameter we set it as a respective
16:55
column Nam okay after that we have to we
16:59
have to uh pc. execute you have to call
17:02
the execute update method record is
17:04
added you to the database this is this
17:05
how the flow is working this is nothing
17:07
but error you click on this it ask
17:09
import the try and catch this also just
17:13
X to cut off over here this one should
17:16
be the
17:17
not okay that's the thing you right so I
17:20
just remove this one this one need that
17:22
let's check it whether it's working fine
17:23
or
17:24
not now I'm going to
17:27
add AR
17:29
address India phone number something
17:31
like that click save button record saved
17:34
successfully now if you go now the
17:37
database is empty okay browse
17:40
here this one should be the auto
17:42
increment number okay so here when you
17:44
make the database you have to make the
17:47
database structure as a auto increment
17:50
so that number is auto increment other
17:51
values are same okay so I I want to load
17:55
the table simple so how to load the
17:58
table the simple code I have written
18:01
myself to in order to write the code
18:03
okay so here simple code okay first I
18:05
have to implement
18:09
the you can see first you have to
18:12
implement the result set
18:15
object RS default dat table model DF
18:20
okay this we have the set to The Columns
18:22
of the table default table model object
18:25
you have cre DF after that we have write
18:27
it over here simple you copy
18:30
this paste it paste on it over here I
18:34
just this all thing you get rid of this
18:36
line try
18:39
also okay now get simple code is the
18:42
simple code okay first what you going
18:44
you simple method phone table open and
18:47
close it get the data from the data
18:49
table okay so here this is the get data
18:51
select all from Conta this is a select
18:55
all from Conta
18:57
mean this is a table name we have to
18:59
load all the data from the contact table
19:02
so we select all from the contact table
19:04
all the details we have getting and
19:06
passing the PST object after that the
19:09
PST object we have to row by row it will
19:11
be calculated so we have to uh execute
19:13
the C PST execute non it is execute this
19:17
qu executing this all the table value
19:19
will be passing to RS object after that
19:22
what I'm going to do is I'm going to set
19:24
into those values into the database uh J
19:28
table model this is a j table this a g
19:30
table okay this name this is a j table
19:33
okay the J you the J table so you have
19:35
write this one TB book this name I'm
19:37
going to write here TBL book I just copy
19:40
and paste the same name TBL book right
19:42
click change variable name TBL book so
19:45
this is the name of the database table
19:49
okay so we have write get model it is it
19:51
has a property which is a gate model
19:53
okay so it will take the property okay
19:56
after that what I'm going to do is first
19:57
you have to uh uh set row count me it
20:01
will be set this all the things are
20:03
clear okay we have to set into this one
20:05
after we have write the Y Loop which
20:08
will be this all the deod will be there
20:11
in the RS okay next mean it will be Loop
20:13
it you have set it to the particular
20:15
columns okay this default this columns
20:18
okay this one name address phone phone
20:21
number so we have to looping how many
20:23
records are available it will be looping
20:25
after DF add R new object we have set as
20:29
Arrow array object First Column I I have
20:31
to set it is a name column T is the
20:34
first value second value we address
20:37
third Val is a phone number so this col
20:38
name address phone it's add to one by
20:40
one so this first one you have to click
20:42
on try and catch you have to this one I
20:45
just contr s cut off contr paste over
20:49
here okay now here what was there
21:08
something I I have just copy this one
21:11
this copy this code this this I provide
21:15
you so here sorry sorry the problem is
21:17
this okay here the thing is here this
21:19
you have to copy this all the code from
21:22
to
21:24
here p on it here
21:31
click on this sound the scratch block
21:33
okay that's a problem I had this one got
21:36
off this
21:40
one why this catch is not working that's
21:43
a
21:48
problem here this C is
21:52
there okay now it's okay
22:01
catch
22:08
Block it's okay okay so this are the s i
22:11
provide you you have it is working this
22:14
phone table you just copy this one you
22:17
have to paste on it over
22:20
here a problem
22:32
this one you have to phone book okay
22:34
write now you can
22:39
see work so this not a phone number this
22:43
one should be the name first one is a
22:46
name I want this a name address phone
22:49
number it's working look like name okay
22:53
work now I'm going to add this one when
22:54
you add the
22:55
record it the this this
22:59
method I when you add the record is
23:00
calling this method after uh get the
23:04
message of the record save
23:08
for T you call this
23:12
one write
23:14
someone address
23:17
India phone number hit save button
23:21
record save it's okay perfec I hope you
23:24
guys you understood things well I give
23:26
this code in my website you will be able
23:28
to get them thank you for watching
#Java (Programming Language)
#Software
#Intelligent Personal Assistants