Up next in 10

JSP AJAX Complete CRUD Application Tutorial Part 1| Step-by-Step Guide for Beginners
Jan 15, 2025
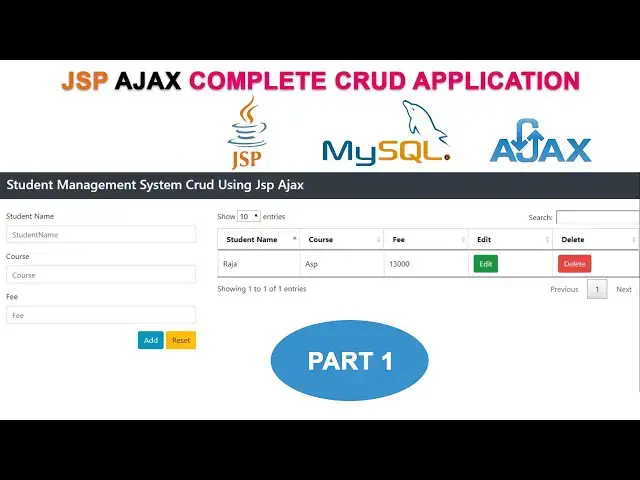
JSP AJAX Complete CRUD Application Tutorial Part 1 | Step-by-Step Guide for Beginners
#JSP #AJAX #CRUDApplication #WebDevelopment #JavaProgramming #AJAXTutorial #JSPTutorial #FullStackDevelopment #LearnJava #CodingTutorial
Show More Show Less View Video Transcript
0:06
uh let me open the net beans now here I'm going to go to the
0:11
file new project select Java web web application
0:18
click next here I'm going to give the project name I just give the project name as
0:24
student management right stent management
0:32
I just put click next select as apach Tom Cat select next
0:40
click finish here your project is created successfully uh defaultly created one page
0:47
index.html let's select this right click and uh select the option delete yes we
0:54
have to delete the page now what I'm going to do is here I'm going to create the index.jsp page so let's select the
1:03
web pages folder right click new
1:09
JSP to write the name as index right
1:15
extension will be automatically taken click finish right now your index.jsp
1:20
page has been created successfully now let's add the bootstrap inside the at
1:26
tag uh I already downloaded how to download uh bootstrap I shown my uh previous
1:33
video so let's this is this the one uh now what I'm going to do is here here
1:38
this is the jsn CSS file inside the boostrap right we have to add it so let's select the boostrap folder right
1:46
click copy back to my net bins select the web
1:51
pages folder right click paste right it pasted successfully now let's rename it
1:58
as a boost so let's select the folder right click refactor
2:05
rename here we have to keep on Bo strap we have to remove the other stuff let's
2:12
click refactor now it's successfully Ren bootstrap right inside the bootstrap we
2:18
have these two folders CSS as well as JS now I'm going to drag the boostrap CSS
2:26
inside the ad tack let's expand the folder now this is a boost strap CSS just
2:33
select and drag here very simple it automatically taken the part if you
2:38
select drag and drop here right after I need this file uh needed boostrap min.
2:45
CSS select this file as well we have to drag here right we successfully drag
2:53
these two files right now what I'm going to do is here I'm going to do another
2:58
thing is now I'm going to to uh design the form right now let's remove it now
3:05
here it is very simple now here first time what I'm going to do is here make the design first we have to create du
3:12
class container open the D close tag close du
3:19
after that we have to write D class row you have write row right right now
3:27
inside the row I have to you have to write the DU tag you have
3:35
write write four right we have divide by two DS right this is first one uh second
3:43
one this is this one uh for the form Design This do for uh need for the table
3:50
design right this one8 right simple right okay this this
3:59
is for form Design This is for table design right it's very simple now here
4:05
this is for uh form Design This is for table design right that's how I have uh
4:13
separated two DS right first I'm going to design the form so go to go to this
4:19
de inside this de here before design the form I have forgotten one thing uh here
4:26
the Eder I didn't design right so let let's first we have to write the header
4:32
first right so here first we have to write here is have write now tag you have write the na
4:39
tag class you write na
4:44
bar na bar we write
4:51
dark here we have write BG [Applause] dark
4:58
right okay now here we have write H3 tag the same thing open and close it now
5:04
here we have write student management cred
5:10
student CRCT adx WR ad right inside here we have
5:17
to make the color WR style
5:23
color right here is white let make the color as white right
5:30
simple right now let's run the program and check how the output like this this
5:37
project right click you can run over here otherwise select this one click on this one you can run here okay there are
5:44
a couple of way to run the project right okay it's working perfectly well here student management CR this is the add
5:51
right now here let's design the now let's design the form design
5:57
right now first what I'm going to do is here I'm going to starting from the form
6:03
tag right when you start the form you must close the form tag right this is the uh structure you have to write okay
6:11
now you have to write form first ID form student this one should be
6:19
student right form student ID write name also the same
6:27
form student right the ID and name should be must
6:33
right when you write adex right this one should be must right you must write this one okay after that what I'm going to do
6:39
is here we have to write D tag du class
6:45
we have write form group form group right here you have
6:51
select the Align
6:57
left you have to close the D tag left right now here first what I'm going
7:03
to do is here in this du tag I'm going to design the
7:08
label the student name right after that we have we need a
7:16
input put box input type
7:23
text ID St name name
7:30
St name placeholder student
7:37
name after that you have to style the bootstrap class
7:43
form control after that we need to write this
7:51
field is Reed right that's the thing we have to
7:57
write here right perfectly right now the same de I get the copy
8:05
contr C copy control V to paste below here I'm going to type
8:15
course ID also course name also
8:23
course placeholder we have type close
8:31
right after that we need another field text field C to copy the same de to past
8:38
here this one for fee here also ID
8:45
fee name fee placeholder I'm going to write as fee right now I
8:53
need two buttons so same do contr c to copy
8:58
contrl V to paste B below here I'm going to create two buttons let's remove it
9:05
here we have write uh we have write we write the button here you write simply
9:11
button type
9:18
button here we have class BTN
9:24
BTN success right BTN BTN success
9:29
write this one ID should be write save here we have a on click method when you
9:35
click this button what happen here we have to write on click method we have to write here is ADD student this is the
9:43
method I have I have to create it for ax right this is the method we have to create right this is the thing we have
9:50
to do right now we have to name the button we have to close tag name this
9:55
one is ADD button right now the same button I have to create another button
10:01
contr C to copy contr V to paste here this button is here
10:08
reset reset reset button you right reset
10:15
button here this one should be you have write here is you have to write the style warning
10:21
this Reon you write here is reset okay very simple right very simple here right
10:29
when when you click this button what happen right now let's run and check how the form look like this here
10:35
it's perfectly well right this perfectly the form is look like perfectly well now
10:41
here what what happen if you fill this form enter student name course and fee
10:46
click add button what happen is it goes to the add student method okay this
10:52
function need go right when you click this button that is the I have written the event on click here if you click
10:59
this button it goes to this function now here uh reset button we have to change
11:05
the ID as reset right now what I'm going to do is here I'm going to create the function
11:12
add student before that I have to add the jQuery so let's back to Google here
11:21
I'm going to download the jQuery first jQuery present key right this is a first
11:29
website right j.com click on this link it take you to the website now here
11:36
click on the download button now here you have to download
11:41
this one second one download the UN compressed development this one right
11:48
right click save link as we have to give the location where
11:56
where do you want to save the file right I have select as if drive I have to create the
12:02
folder jQuery I have to create the folder jQuery open the folder inside the folder
12:09
I'm going to save this file click save right it saved successfully now what I'm
12:15
going to do is here I have to uh download download another file this is very important file this one is a
12:23
jQuery validate validate mean.js right jQuery validate
12:31
mint JS this file right this two files have we needed in order to connect with
12:38
ax click search here this is the first link here
12:43
J validation this is the website we have to download them right uh click on this
12:50
one here you can see here right this is the files right here jQuery validate Js I
12:59
need only this one right jQuery jQuery validate uh min.js this file we needed
13:06
right this file also we have to download the same way right click save link as select the location
13:15
uh inside the uh F drive inside the jQuery for the same folder I'm going to download this file as well we have to
13:22
click save right I have download the recard files both now I have to
13:30
uh I have to uh paste on the web pages folder those uh files right so let's go
13:36
to the F drive inside the F drive we have a folder jQuery this folder double
13:43
click and open this this right these two files right now let's select the jQuery folder right click copy back to net
13:52
beans select the web pages folder right click hit paste
13:59
right now it pasted successfully okay this is the thing you have to do right now what I'm going to do is here after
14:08
after this this D right this is the closing D this container D starting here
14:14
ending dig here right after that we have to we have to this here we out to this
14:20
two d right uh J this JY JS and and JY
14:26
validate min. J two F select this one first select first this file you select and drag here it automatically taken the
14:34
path the same thing this file also you have to drag and drop here it's automatically taken the PA you no need
14:40
to write okay net beans it's automatically taken the path very simple
14:46
right now here after that what I'm going to do is here we have to write the function right so how to write the
14:52
function first you have to start with script you WR script start the script
15:00
starting tag we have write closing tag here script closing
15:09
tag close it right now here in between you have starting and closing T you have
15:15
to write the code right this is the uh way you have to follow the structure
15:21
right now here what I'm going to do here first what I'm going to do is here we have to create the variable bar is new
15:30
equal true have to Pro it first right this is the thing first you have to do
15:35
it right after that what I'm going to do is here we have to create the function
15:41
which function we have to create add student function I'm going to create so how to create here is we have
15:48
to write here function we have to write a function name the same name you have
15:54
write so let's copy the function right contrl C to
16:00
copy contrl V to paste here right now open bracket and close
16:08
bracket inside here we have to write the code right first what I'm going to do is here we have to write
16:15
if we have to write dollar sign inside here we have to write the form ID right
16:23
form ID mean this form ID this is the form ID what the name
16:30
student frm student right let's select this one right click
16:37
copy paste it here we have to write like this right and paste
16:43
it right this is how you have to write this is the efficient way to write the program right dot
16:52
valid you have write the valid okay you have write valid looks like this after
16:58
that in inside here we have to open and close bracket now what I'm going to do is here inside here I'm going to create
17:05
three variables uh URL data and Method first you have jaar URL
17:14
equal right like this okay where data
17:22
equal right this blank right first time right War method
17:29
equal right like this okay right this is the way you have to follow method we no need it only we need
17:37
these two things right okay now what I'm going to do see first I'm going to add the record into the database so we have
17:44
write like this if the same thing is is new this fun
17:51
this this variable you have to get it here is
17:56
new equal true if it is true mean you have to add the
18:02
record into the database right so we have to write here uh this URL variable
18:07
passing here URL equal which page it it should be vit right have you have write
18:14
here is ADD we have write add we have write uh add
18:20
student. JSP page we have write like this add student we have write like this add student. GSP
18:28
page okay we have write like this after that we have to write data equal data
18:35
mean which data we have to pass into this page we have to uh we have to tell
18:40
here right to data which data you have passing to this page right which data this all form data right student
18:49
name course as well as Fe this all the fields fee name uh course and St name
18:56
this isent right so here we have to write this simply you have write the serialized method here right we have to write the
19:02
same thing the same thing okay you have contr C to copy control P to paste
19:09
here dot the completely form I'm going to seriz dot we have a method called
19:15
serialize is a serialize method this is the method serialize the completely form you have to serialize and send into this
19:22
page student. gsv page method what is the method we have to use use it here is
19:28
post method we have to post the all values to that uh add student. jsv page
19:34
right we have to tell them here right very simple okay very simple
19:41
after that what I'm going to do is here I'm going to go to create the at student. gsv page so select the web
19:48
pages folder right click new
19:54
JSP here I'm going to create the page as add
20:01
student add student right page I'm going to create add student click finish right
20:08
here add student. gsv pH right what is inside here uh add student.gs I have to
20:15
remove it now you have to open the GSP tag and closing GSP
20:23
tag inside the tag what I'm going to do is here first first I'm going to download the Js
20:29
jar files so let's back to Google here I'm going to type Json
20:36
simple here this one right Json simple 1.1 J this one right click on this one
20:44
here this is the website Java tos.com here download Json simple this J right
20:49
click on this one this is the version uh now what I'm going to do is here click
20:54
on this one if you click the that uh file has been download
21:00
successfully here right click sh folder this file I just cut and paste inside
21:08
the F drive right this files should be there now I'm going to extract it right click
21:15
extract all extract right now let's check whether file is there or not here
21:22
this one if you open the folder this is the jar file we have added into our libraries so let's back to our net beans
21:29
this is my project student management here I have to add this jar file into my libraries okay this the library folder
21:36
we have ADD it so select the library folder right click add jar folder
21:41
option here you have to uh select where you where your file reside on your
21:48
computer right my file is reside on the F drive so what is the name of that one
21:54
JY simple uh sorry j Json simple this one this one Right double click and open
22:00
the folder this is the file jar file select and open
22:05
it right now you can check here it is added into our library successfully
22:12
after that I have to added the MySQL connector right MySQL connector how to download it I already explained my
22:20
previous videos how to download the MySQL connector so let's select the
22:25
libraries I have to add the myql connector as well jar file also select
22:30
here uh we have f f folder MySQL
22:36
connector this one this two jar files also we add this one all on the control
22:43
key down and select both we have ADD it right this jars are must okay myql
22:50
connectors as well as a JSM right now here we have to start with Json array
22:57
Json ER first four uh file letter should be
23:03
uh Capital after that you have to write simple right you have write like this
23:08
after that you write list equal new
23:16
Json array right we have to create the object list right now here we have to select
23:24
this one we have to add the class right import for this class right this classes are coming from this jar
23:33
file okay this jar file jsn simple this jar file okay if
23:40
you are not uh important into your library we can't access these classes
23:45
right after that what I'm going to do is here uh we have to when you click the
23:53
button when you click add button it goes to the add
23:59
function Okay add function now here the complete complete form I serialize right
24:05
complete form in this complete form I serialize and send
24:13
into at student. GSP page right so we have to retrieving this
24:20
data St name cost and C right so here we
24:26
have to get it get them right so we have how get them here same thing
24:33
string student name
24:39
equal request dot get parameter here we have to write
24:49
St name after that you have write second one so the same thing control C copy
24:58
contr will be to P below second one
25:04
course here course right okay what is the name you
25:10
have given here the same name we have to retriev in here right otherwi if you given the uh different name it won't
25:18
work right so the same after that we have write another thing is a fee so fee should be integer so you write integer
25:25
data type fee equal you have write we have to convert
25:30
integer dot passint after that we have write
25:37
request dot get parameter get parameter
25:43
right you write like this here you get it as a fee right this is the efficient
25:49
way you have to retrieving the data right okay when you click submit button
25:55
sorry when you click add button it goes to the relevant function add student function here I'm going to send it value
26:03
should be send it right so all the form data should be serialized and send it
26:08
right this URL student at student.gs this page right we are retrieving them
26:14
after that what I'm going to do is here here I'm going to add the classes
26:21
SQL classes first it is easy stuff you have to add the classes you have to write page
26:31
page right import equal we are to access all the
26:37
SQL class so you have write uh java.sql you have write this as sign mean we will
26:46
be able to access all the SQL classes okay if you write like this okay now we
26:51
can write here connection you have to create the connection object connection
26:57
con after that we have to write the prepared statement object so
27:03
prepared statement
27:10
PST after that we have write the try catch block so you have write
27:19
try after that you have write catch
27:24
block you write here exception
27:31
right this is very important stuff okay you must write the try try and catch block right so
27:39
here I'm going to write here first Json object Json
27:47
object here I write OBG equal
27:56
Json object right now you have to add the class
28:03
select This One Import for this class right here can add it it's automatically show right here this both classes you
28:10
added right jsn array and jsn object right now
28:15
here I'm going to register the driver so class do forone name you have to add the
28:21
myql driver here com do MySQL do
28:29
jdbc do driver you have to add like this after that after that we have to
28:37
write the database URL so we have to write connection equal date driver
28:46
manager dot get connection here we have
28:52
write jdpc MySQL
28:59
you have write my database is reside on locost so you have write local lost what's the database name St crit
29:08
you have to specify the database name here right this is the database you have to specify St crit right inside the
29:14
database we have a table records right St great now we have to
29:20
give the MySQL username and password the default username password will be root
29:27
password uh username will be root password will be blank when you install
29:32
the Sam server default username will be root default password will be blank
29:39
right after that what I'm going to do is here I'm going to write the insert C so
29:45
we have to write the prepare statement PST equal we have to write
29:50
connection dot prepare statement here we have to write the
29:56
insert code how to write the insert code insert into which table you going to
30:01
insert the records records table we have to specify the columns properly right
30:07
these are the columns ID student name course fee right now let's write here is
30:14
s name comma course comma fee here we
30:20
have write values we have write write the
30:26
statement three question mark so we have a three data so we have a we have three
30:33
columns so we have to pass three question marks right after that what I'm
30:38
going to do is here we have write PST set
30:44
string one one mean this one okay this all the we have ring all the values
30:51
assigned to the relevant variables this variable I'm going to get it and add the data right first St name this one CR C
31:00
to copy contr V to paste here right this name should be go here first question mark it's put into First Column right so
31:09
contr C copy contr V to paste second one should be course contr C copy to past
31:15
here second one should be goes to this question mark it's put into this column
31:20
right after the third one we have write here is this one should be the integer type so we have write set in this the
31:28
third one C this one goes to the here this
31:33
question marks it put into this column right now we have to add the data so we have write call PSC do execute update if
31:42
you call this method data is added into the database right after that what I'm going to do is
31:48
here we have write the we have to get the jsn object this
31:53
one putut here we have write
31:59
name you right here
32:04
success right write like this after that you have write list this mean this array list Dot and
32:14
you have write this object write OPG that's it after that you have write
32:22
how. print Ln here we have write
32:30
list dot to jsn string here we have write out do called
32:39
The Flash method that's the thing we have to write after write the insert
32:44
code let's back to my index.jsp uh let's write the
32:50
adex let's start with the edx function so you write edx function like this edx
32:59
right now you have to close it here right you have to write like this now you have to press enter key inside here
33:06
first this variable we have to pass it through ad X so we have to write type
33:13
first we have to write the type type mean this one which type method write
33:20
the method which method post method right it decide on this variable we have to pass it here method comma
33:28
after that we have write URL second one you have to pass url url me
33:34
this this variable you have to pass it a URL comma third one should be the uh
33:42
data type data type we have to write as a jsn this a jsn format right jsn format
33:52
comma data data this all the form serialized
33:58
data we are passing this variable we have to call it here right that's it that is the thing we have to write here
34:07
right after that we have to write the D success function
34:13
success for the
34:20
function Open Bracket close bracket now here uh everything correct now let's we
34:28
have to if this is
34:36
new equal equal
34:41
true right here is message alert right here record
34:56
added right that is the thing we have write here right if everything correct
35:01
right this all the URL it is sending uh through adex right okay through adex
35:08
right it's it's sending through adex to this page okay after you add the record
35:14
it receiving to inside the uh success function right the data is uh
35:20
successfully added it's back to index.jsp and uh display the message
35:27
recorded right now let's check whether it's working F or
35:33
not right here let's write the name here right now let's write the uh we
35:41
have to write here is sa this
35:46
C Java C 20,000 that right click add
35:56
button now what happen is that right click impact we check the
36:02
error here console uh value function is not
36:08
valid right the problem here function not
36:18
valid right the problem is what is the error coming here is uh I have a mistake
36:24
is this function is not Val in here if you get any error you can select right click and go to
36:31
impact go to the console you can check what is error you must read here okay this this here this error Okay click on
36:40
the line it show the error here okay valid right the spelling wrong valid you
36:47
have write v a l that is a problem right now let's check again let's
36:54
run right now I'm going to add the uh name right
37:00
satis course I'm going to write PHP see I'm going to
37:07
write right now let's click add button here record add it's successfully
37:12
working ASX here it's working fine right after add the record uh I want to uh
37:20
clear this text box as well so that's the thing how to do now let's check whether it's working fine or not go to
37:27
the table refresh it here it's working fine s this PHP Fe added successfully right
37:34
now I want to do another thing is after add the record I want to clear up the
37:41
this text boxes so how to do the this after get the message right so here we
37:47
have to write here in Access function here we have right you have specify the uh text box
37:55
names here first one should be the this name St
38:01
name so you write here like this s
38:07
name do Val write a Val function we have right click you have to
38:13
write like this this this how you have to clear the text box right okay now the
38:19
same thing contr C to copy contr V to paste here second one should be the
38:25
course C to copy can third one should be the fee right perfect now let's
38:35
save and run it this time I'm going to write
38:42
Aron and cost I'm going to write here as jfp fee I'm going to write as 25,000
38:51
let's right like this okay if you click add button record click okay here it's working fine okay it's working fine I
38:59
hope uh guys you understood uh the things well uh I will continue my next
39:05
tutorial
#Programming
#Java (Programming Language)
#Web Design & Development