Up next in 10

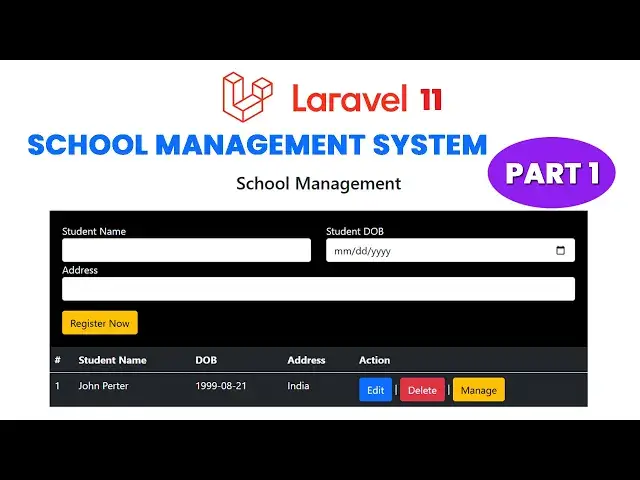
Laravel 11 School Management System Project: Full Tutorial Part 1
Source code : https://www.tutussfunny.com/laravel-11-school-management-system/
#Laravel11
#SchoolManagementSystem
#LaravelTutorial
#PHPDevelopment
#WebDevelopment
Show More Show Less View Video Transcript
0:00
hi friends welcome to tutor funny
0:02
Channel today I'm going to teach the
0:04
larel 11 School management system in our
0:07
last video I have show the demo of the
0:09
system so here here this model we have a
0:14
schools management system so here if you
0:17
want to see the demo simply here this is
0:19
the page uh you will be able to enter
0:21
the student details so here I'm going to
0:23
add this
0:25
Raja you have to select the
0:28
do of Raja you can select here the
0:31
do as like
0:35
this can select like this so address I'm
0:38
going to select as
0:41
USA click register Now
0:45
button here the Raja has been registered
0:48
you will be able to edit the record and
0:50
edit the record you can can manage the
0:51
raja's records oh here okay so the
0:55
record title uh some of the title okay
0:59
uh first time
1:02
first
1:04
ter
1:08
ter date cre dat something like that
1:12
first term
1:16
record something like click add button
1:19
you'll be able to add so this how we
1:21
have maintained the system so how to do
1:23
it the things okay so what you are going
1:26
to do is so this project I I'm going to
1:29
include this edit and delete everything
1:32
so here this a Raja here everything is L
1:35
this how we have calculate the student
1:37
marks student uh all the student details
1:39
everything you have calculate like this
1:42
right so we'll do it the system step by
1:44
step first what I'm going to do is I'm
1:46
going to go to G drive here I'm going to
1:50
create the new
1:51
project
1:54
School management app
2:04
CMD you to go to
2:07
theable official
2:09
website so here you no need to go to the
2:12
official website you will be able to go
2:13
to the official website so here when you
2:15
go to my website name which is t.com you
2:19
first first one you can click on
2:24
this if you want to see all the video
2:26
tutoral you will be able to check
2:28
everything here so you will be able to
2:30
see here this one yeah this is the step
2:33
by step process I explain first you have
2:34
write compose create project larable
2:37
larable uh School management app if you
2:39
write like this you just copy this
2:42
command you to go to the directory where
2:45
you are going to create the
2:48
project type on the address bar open up
2:51
this command front uh I already open it
2:54
okay sorry okay already there here you
2:57
you make sure you open it inside the
3:00
folder inside the folder name after that
3:04
you right click what is the command you
3:07
are copied here this is the project name
3:09
if you want to make any spelling mistake
3:11
you have to correct them over here at
3:13
the moment we don't have any spelling
3:15
mistake press enter key on your keyboard
3:17
now you have to wait until the project
3:20
has been
3:23
created now here you can see that my
3:25
project is installation has been
3:27
completed successfully you have to go
3:28
inside the project so what I'm going to
3:31
do is I'm going to type the command
3:33
CD
3:36
School manage
3:39
month
3:41
app press key you have go inside the
3:44
folder now I'm going to open up this all
3:46
the project in my vs coordinator you
3:48
type the comma code
3:53
space now the project is open up the VS
3:57
Cod successfully you'll be able to see
3:58
here now what you're going to do is here
4:01
I'm going this a folder you have all the
4:04
folder you'll be able to see over here
4:06
now here what you're going to do first
4:08
step I'm going to mention it my project
4:12
here you'll be able to see here you have
4:14
to configure the databases okay so you
4:17
have to open up your Zam server this is
4:18
Zam server so you have to click
4:22
admin okay so here I'm going to uh name
4:25
it you here you can see
4:28
defaultly it is come as you have to go
4:31
to the database configuration go to the
4:33
en file file here default it come as a
4:37
SQL R has been SQL you have to change it
4:41
as SQL to my SQL so how to change it so
4:47
here you can this all thing you have
4:48
select them all on the control key plus
4:53
forward slash on your keyboard press
4:55
forward slash contr key plus forward
4:58
slash on your keyboard you press all
5:00
together you have to uncommon everything
5:03
now here you have a database name you
5:05
have to change you'll be able to change
5:06
the database name which is
5:08
a uh we will be change it as
5:11
a uh School management so I'm going to
5:15
create the database databases over here
5:18
so click on
5:24
new uh what is the name I have
5:28
given DB management this database I'm
5:31
going to
5:34
create database has been created that's
5:36
all you only the things you have to
5:38
create database only other all the table
5:41
creation everything you have done
5:42
larable migrations okay so this what's
5:45
the name you have created you have to
5:46
specify the name of the databases over
5:48
here you have to specify the database
5:51
name after the user Credence you have to
5:53
enter the user crell of the username and
5:56
password of the database so use I I
5:59
install the
6:00
database uh Zam server my username is
6:03
root password is back BL okay after that
6:07
we have to change the database type
6:10
which is a
6:12
my you have to change the database type
6:14
as well that's that's you file save
6:19
that's you have it file save that's
6:22
thing you have now we successfully
6:24
configure the
6:27
databases perfect now what you
6:32
after
6:34
that uh I'm going to run the my project
6:36
and check the vome screen or the welcome
6:38
screen look
6:40
like how to how to run the larable
6:43
project you have to go to the terminal
6:45
new new
6:47
terminal we have run it
6:50
here PHP uh Ser key on your keyboard now
6:54
you have seen
6:56
the uh port which will be running I just
7:01
copy this paste on the
7:06
browser uh what is the
7:08
problem uh the DB s and everything I
7:12
have a problem here
7:20
sometime okay the problem is this what
7:22
thing is we have to to make the
7:26
migration command so control C to stop
7:30
the project I'm going to type the
7:32
command PHP
7:36
Artisan
7:40
M okay here table all the tables are
7:43
migrated so you have to press the up and
7:47
down arrow of your uh
7:49
keyboard and you have to take the
7:52
command Okay PHP Artisan serve again
7:56
okay in rather than type again okay it
7:59
is a
7:59
simple one if you type it take too much
8:01
of typ uh make the time so you have to
8:05
uh get the help of your up and
8:08
down uh Arrow of your keyboard you can
8:12
get the command uh run the application
8:15
of L okay press enter key now you again
8:19
you have run the project now let's check
8:22
now the eror as go away here you
8:24
successfully you'll be able to get the
8:27
Lal Dash here to successfully get the L
8:31
dashboard like
8:33
this right perfect now what you're going
8:35
to do this after that you have to go to
8:38
the migration part first first step we
8:41
have to go to the migration what is the
8:42
migration which it is nothing but a
8:44
create a tables what are the tables we
8:46
have created we have create two
8:48
different tables one is a students table
8:50
and one is a student record table right
8:53
so first step we are going to proceed to
8:57
create the student t
9:00
so let's proceed
9:03
the let's proceed with the creating the
9:05
new table so let's copy
9:09
this so let's bring uh copy this and
9:12
bring to
9:14
our Command from window here the project
9:17
is already running don't close the
9:19
project
9:20
so uh parall running the project we have
9:24
click on the plus symbol to open up the
9:28
another uh terminal here we are you have
9:33
to face you have to paste the command to
9:37
create the migration file so I'm going
9:41
to how to create the migration file of
9:43
the student table I'm going to create it
9:45
in L we have to called as a student
9:47
table creation we have called as
9:48
migration so PHP make migration call
9:52
migration create then you have to
9:55
specify the name of the table what's the
9:56
table name you have to specify the name
9:58
of the table sud which is the table name
10:00
you have to specify the name of the
10:01
table correct name this is okay so uh
10:07
here you have to observe this one this
10:09
is not a uh sing this is not a singular
10:13
it's a plural you have to write along
10:15
with this student not is wrong students
10:19
okay press enter key now the migration
10:22
part is done successfully it is creates
10:24
inside this directory so go to databases
10:28
migration here we are the migration file
10:30
click on this okay this is the simple
10:33
stuff only the ID is default it will be
10:35
created time stamp time and time and
10:39
date should be created automatically
10:41
here we have to specify the columns what
10:43
are the columns you are going to create
10:45
so I'm going to create the following
10:47
Columns of the students what are the
10:49
columns I have to create a student name
10:52
DB which nothing but the date of birth
10:55
address and state this all thing I just
10:56
copy it
11:00
over here here the you can see this a
11:02
name it should be the string type do is
11:06
a date type data date type string which
11:09
is address string which a status
11:11
defaultly it will be the active okay
11:14
here we have this one uh we are not
11:16
going to put the combo box and display
11:20
we just putting this one active okay if
11:22
there any pro if you want to disable
11:24
student there will the deactivate button
11:26
we deactivated so at the default it will
11:29
comeing as active will be activated when
11:31
the student is registered it the student
11:33
become
11:35
activated okay if you want to deactivate
11:37
the student you just go to the database
11:39
and we'll be able to make the validation
11:41
okay that's the thing you have to do
11:42
this is very must okay the active thing
11:45
is must when the student is registered
11:48
student become active
11:50
student right so that you have do the
11:53
things
11:54
professionally accurate way that's a
11:57
must when you have go to the the
11:59
industrial expert of the laral program
12:01
or any other software development you
12:03
have to make as a industrial
12:05
standards right that is a very essential
12:09
stuff to gr up your uh software
12:12
development Journey that is a must right
12:14
okay so let's all things are done it so
12:18
after make sure you have save all after
12:21
save all I want what what what the
12:24
things you have to we go to the
12:25
documentation you have run the command
12:26
PHP AR and migr is the command you right
12:30
copy
12:32
this otherwise you can type
12:35
PHP
12:38
Artisan migr if you have a
12:45
good PR okay uh why is uh what's the
12:51
problem okay sorry I have made a
12:53
misspelling is
12:56
UE here successfully if you want to
12:59
check whether the table has been created
13:01
or not you go to the database table you
13:04
have click on this your database what
13:06
the database you created here the
13:07
following tables has created here
13:10
students table has been created you
13:11
click on this students table inside the
13:13
students table you will be able to check
13:15
uh see all the
13:17
student columns what are the columns
13:20
student as these are the student got St
13:23
names video address status everything
13:26
there I hope you guys this one help you
13:29
uh to you I'll continue this uh lesson
13:33
in my upcoming video tutorial thank you
13:35
for watching
#Business & Industrial
#Computers & Electronics
#Jobs & Education
#Educational Software
#Private Tutoring Services