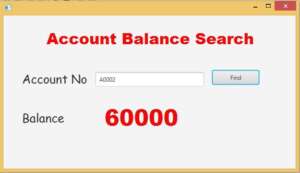
This JDBC will teach you how to do the search in Netbeans using Mysql Database.
First Step
Install Scence Builder in your computer follow this link to download the scene builder which will offers all visual layout components which will easy to drag and drop and make the attractive look. After installed the Scence Builder in your computer successfully.open the netbeans and select new project ->JavaFx- you can select here JavaFx FXML Application and click next it will automatically configure the scene builder path. i attached the
screen shot image below.

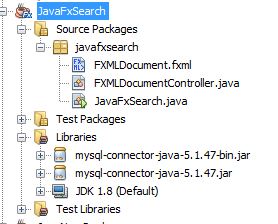
After created the project you will get the project structure look like below.
Double click and open the FXMLDocument.fxml your Scence Builder will be loaded and open. then your make your design as you like.
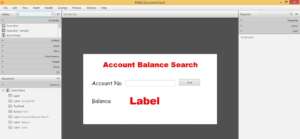
after done the design you must name textfields and tables and tables coloums. after that copy code. go to view->Sample Skeleton
Copy the code
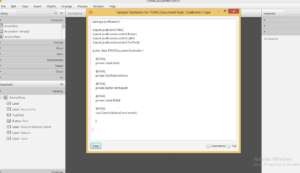
And paste into FXMLDocumentController inside the class. remove the default design and keep as it is a initialize method. this code which will manage the Add Records and View Records from the database.
/*
 * To change this license header, choose License Headers in Project Properties.
 * To change this template file, choose Tools | Templates
 * and open the template in the editor.
 */
package javafxsearch;

import java.net.URL;
import java.util.ResourceBundle;
import javafx.event.ActionEvent;
import javafx.fxml.FXML;
import javafx.fxml.Initializable;
import javafx.scene.control.Button;
import javafx.scene.control.Label;
import javafx.scene.control.TextField;
import java.sql.*;
import java.util.logging.Level;
import java.util.logging.Logger;

public class FXMLDocumentController implements Initializable {

     @FXML
    private Label label;

    @FXML
    private TextField txtAcno;

    @FXML
    private Button btnSearch;

    @FXML
    private Label lblBal;


    Connection con;
    PreparedStatement pst;


    public void Connect()
	    {
	        try {
	            Class.forName("com.mysql.jdbc.Driver");
	            con = DriverManager.getConnection("jdbc:mysql://localhost/vbank", "root","");
	        }
	        catch (ClassNotFoundException ex)
	        {
                    ex.printStackTrace();
	        }
	        catch (SQLException ex)
	        {
                     ex.printStackTrace();
                }
            }

    @FXML
    void Search(ActionEvent event)
    {
         Connect();
         String id = txtAcno.getText();

         try {
             pst = con.prepareStatement("select bal from account where accno = ?");
             pst.setString(1, id);
	     ResultSet rs = pst.executeQuery();

			            if(rs.next()==true)
			            {

			                String balance = rs.getString(1);


			                lblBal.setText(balance);


			            }


         } catch (SQLException ex) {
             Logger.getLogger(FXMLDocumentController.class.getName()).log(Level.SEVERE, null, ex);
         }

    }


    @Override
    public void initialize(URL url, ResourceBundle rb)
    {
        Connect();
    }

}
i have attached the video link below. which will do this tutorials step by step.