Up next in 10

Build a Complete Inventory Management System in C# | Step-by-Step Tutorial!
Welcome to the ultimate CSharp tutorial for building a real-world Inventory Management System! Whether you're a beginner or looking to sharpen your skills, this project is perfect to master the core concepts of C# and practical software development.
Source code : https://www.tutussfunny.com/category/c-net/
In this video, you’ll learn:
1. How to create a full inventory system using CSharp
2. Real-world application structure and logic
3. How to manage products, stock levels, and more
4. Database integration and clean UI design
5. Best practices for modern C# development
6. Generate crystal reports
This is not just a C# tutorial for beginners, it's a complete C# course to help you learn C# by doing. From setting up your environment to writing code that works in the real world — you’ll get it all right here.
🔧 Tools Used:
Visual Studio
SQL Server
Show More Show Less View Video Transcript
0:00
hi friends welcome to tutors funny channel Today I'm going to teach milkshop cost system with crystal report
0:06
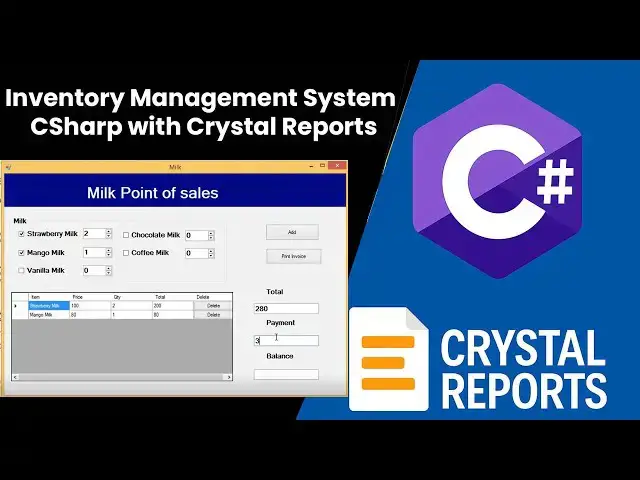
print receipt using car.net Let us show the demo first These are the
0:12
milk favors in our shop Here it's order the strawberry quantity two milk uh
0:20
mango milk two and vanilla favor one Click add button The relevant item
0:26
should be added successfully These are the prices quantity and total If you want to remove the item click delete
0:32
button Here it's remove it The same time uh total should be reduced here What I'm going to is now if you want to pay the
0:39
uh amount click you have to type the pay amount here Automatically display the
0:45
balance Click print invoice button Sales come here Click okay It's display the
0:51
print receipt Nice Print receipt in uh print for the uh crystal report This is
0:56
crystal report design simple design If you click print here if you click print button you
1:03
ask for the printer and click print it will be printed Right here you will be
1:08
when you click print invoice button it's automatically printed Right here there will be the another choice automatically
1:15
printed Here I have to shown that uh automatically printed It's very tough
1:20
I'm going to remove the print instead of uh showing the print view preview If you
1:27
click remove it here now I'm going to order again We'll check it's automatically printed right
1:35
I'm going to run again right here Now I'm going to one This one should be one Click okay Add button Started
1:42
successfully Print here Pay the amount Right Click print invoice Sales successfully Now here it's not uh it is
1:49
not here it's displaying here Now the printer is connecting it's
1:56
automatically print the mail right it's very simple stuff you have to do right okay perfect now what I'm going to do is
2:03
how to do this system step by step I'll be explain right now what I'm going to
2:08
see I'm going to go to the I already open the visual studio now let's go to the file new project
2:16
select visual car with windows application you have to give the project
2:21
name I'm going to give as milkshop Right You have to select the location where you going to save this project
2:28
Click okay Right your empty form has been created
2:33
successfully Now here we have to design the form Now let's increase the size
2:38
look like this First what I'm going to do is here I just go to the toolbox Now
2:44
here first I'm going to uh write the heading here So let's go to the toolbox
2:50
Drag drag one panel here Drag one panel here So select this
2:58
one Right click properties Uh here we have to write uh you have to
3:04
select the background color Select the background color as
3:10
uh this color I'm going to select this color Right now I'm going to drag the text
3:17
uh label Right I'm going to drag one label This one I'm going to change the uh change the text color as
3:26
uh this one should be the milk uh milk pass
3:33
you see uh milk post I'm going to use milk point of sales system right
3:39
point of sales point of sales sales p
3:44
I just give like this I just give you uh milk point of sales Right Press enter
3:50
the key Now let's select this one Increase the size of the font
3:56
So we have to increase the size here Go to the font property with bold
4:02
Increase as uh 28 Right Perfect Now let's select the
4:07
align center here Now here what I'm going to I'm going to change the font foreground color as white It would be
4:14
better Right now let's run the when the form is run it's run it should be run at the
4:20
center So select the form here Go to the properties Start position Uh default the command uh
4:28
windows location Default location You have to default location You have to uh
4:33
select as center screen Right now if you run the application
4:41
you can check here when the application is run it here It should be running at the center Right simple Right now this
4:47
is the things you have to do first Right after that what I'm going to is I'm going to do the another part right So
4:54
let's go to the uh toolbox drag the group box So group right
5:00
here when you searching the tools you not worry about that where the tools
5:06
there are easily you have to find here right group box you click G gr here the
5:12
group box are there Now here uh after that you have to search the text labels
5:17
here label the lab label right now you have drag here right very simple stuff right now let's control C copy control V
5:24
to paste you have drag sorry not label we don't needed here instead of the label I'm going to drag the check boxes
5:30
right check boxes then it is easy for the validation part right drag text boxes here drag one after that you have
5:37
to get the copy right C to copyr past second C to copy Copy Ctrl V to paste
5:44
third Ctrl C Copy Ctrl V to paste here Fourth Uh fourth I'm going to put another group box here for the
5:52
uh we have to do here Right Right Okay Fourth
6:00
Ctrl C to copy five Right This is the thing we have to do Now what I'm going
6:05
to do is here we have write here simply select this one
6:12
uh here first one should be the strawberry milk first one should be the strawberry milk you have to write a
6:18
strawberry milk here so here I no need to write here I just copy this one and I
6:23
paste you have to write this one if I write this and put it it take too much of time to complete the project so that
6:29
I select the text box I have to text I'm going to control Ctrl D to paste it right this one select this checkbox
6:35
uh checkbox text which we has the check property you have to select here I'm going to paste this one right you have
6:41
to type this all the stuff right you have to type it if I type it take too much of time to
6:48
complete the project that's why I just wrote this all the stuff so it is easy to copy select the checkbox where the
6:56
text uh text property control to paste here say this checkbox
7:02
copy this text checkbox for this one Paste it Select this one This text
7:11
Select this one Control V to paste it Right Perfect Now let's select this uh group box
7:16
Name this one as a milk Right Now what I'm going to do is you
7:22
have to select all the stuff here Now we have to make the font size as foreground
7:28
font We have to make board 20 12 Right Yes Perfect Right Perfect Now what I'm
7:34
going to do is see here you have to do another little stuff is here
7:42
you have to drag the uh this one
7:50
numeric updown right this one you have this is this is how we have to select the quantity right very simple stuff to
7:55
select the quantity here you have to drag this one this quantity you have to simple here how many quantity we need
8:02
you have simple one for numeric one this one right so I need uh
8:08
another four one so select this one control copy V to paste here select this one control C to copy control V to paste
8:15
here right you must understand the shortcut key the same like word right
8:20
you not you don't worry about the what is the shortcut keyr Copy and paste the same key in Microsoft control C andrl V
8:28
this is the shortcut of the uh visual studio as well Right So this also
8:34
control C copy control paste here
8:39
This also control C copy paste here Right okay Perfect This is the thing we are putting Right now what I'm going to
8:46
do is here we simply design the software like this now here let's you have to
8:51
arrange them look like this Right design is must right when you
8:57
right now here we have to select the right Okay Now what I'm going to say we need another thing is a table right so
9:04
table let's go to the toolbox drag the data grid view on the form this is data
9:10
grid view we just select and drag on the form like look like this right now here now here what I'm going to do is here
9:18
we have to arrange the size first right okay now here first I'm going to
9:24
design the heading uh title here right so select this one here this arrow click on this one add columns first column I'm
9:33
going to add text I'm going to add as item the first column item sorry item
9:39
click and second one should be the uh price
9:45
click add third one should be the quantity heading
9:51
fourth one should be the total these are the columns you need to add right final one should be the delete
9:58
button delete Right if you uh willing to delete the uh product you click here
10:04
Right so you need a delete button Delete button This this is not a text column We
10:10
have select as a data grid view button column Name you have to give as this one
10:15
as a delete Right you have to give this one as a delete here Right this one must you you should give the name here Right
10:22
get this name and you have to delete this one We will uh later on I will explain how to do the task Right now
10:27
let's add Right that's the thing we have to do right okay Perfect right so things
10:33
perfect Now let's select this one and we have to do another all uh simple modify edit columns Select the delete button
10:40
here We have to give the delete button text you have to select this one as a delete Here at the same time use column
10:48
text for the button It default come as false We have to make it as true Then only the delete delete button name
10:55
should be shown Right Click okay This is the things you have to do right now
11:01
again this is the auto column right so you have to what you what you are going
11:07
to select this one in data grid view you have to allow user to add rows this one
11:13
you have to false right now it's better right this look better now after that
11:18
what I'm going to do is here we have to do the another important stuff here we have to uh do the
11:26
this one Right We have to write here We have to put another you can put the
11:31
group uh group another group can do the task I not putting here I just put it
11:37
here This one should be the total We just total This one should be the total We have total text box We have to this
11:44
one text we have to make it as total And the same text C to copy control B to
11:51
paste here Sorry Ctrl C to copy Ctrl B to paste here Second one This one should be the payment
12:03
Third one should be select this one Control C copy control V to paste here This one should be the balance
12:12
[Music]
12:18
Select three labels Hold on the control key down and select the labels Go to the
12:23
properties font property Here I'm going to change the font uh with bold 12 Right
12:31
here you can increase the font like this Now we need a text boxes Right Now let's
12:36
select all the control key down and uh control key down and you have to arrange
12:42
like this Right now we need a go to the toolbox again You have to drag three text boxes Right so go to the toolbox We
12:51
have to drag three text boxes here First one Ctrl + C to copy Ctrl V to paste the second one
12:57
Same thing Ctrl C to copy Control V to paste Third one Right you have to get it like this Right simple right now let's
13:03
select all You have to increase like this Right simple right you have to do like this Now what I'm going to do is
13:09
here I'm going to do put two buttons First one should be the add Second one is the print invoice Right so drag two
13:16
button Double click Double click Right simple It's only the button We have drag two button right okay Perfect You can
13:24
get one button and you can control C to copy control B to paste and get the duplicate one Uh otherwise you can
13:31
double click If you double click double click it will automatically create it Right one one by one right it's simple
13:37
right now See select this one Now I'm going to select the text as this
13:44
one should be the add button Second one should be the print invoice
13:53
enter right now select this one form title I'm going to give as milk
14:03
select click start to run the uh project here it's look like this now I'm going
14:09
to do the stuff right now let's close it now what I'm going to do is here
14:15
uh first what What I'm going to say I'm going to first I'm going to give the this one right first we have to check
14:21
the validation part first right so this add button double click on this one here
14:27
first I'm going to make the validation part right if the user select this item and calculate the
14:35
amount all the stuff we have to do right so first we have to write the string
14:42
name you have to create the variable string name second should be int price
14:49
equals zero Third one should be int quantity
14:55
After that int dot equal zero Right now I created four
15:04
variables Right so this three three are integer type This only the string type
15:10
data type Right now here first I'm going to do the validation of this If the user
15:15
select this checkbox and select the quantity what happen right So what's the
15:22
name of this checkbox this one we have to name it as we have simple we have to name it as chk1
15:30
It's a chk1 It's very simple This one we have to name it as select this one ch2
15:39
Select this one Name this one C H K3
15:45
press enter key This one C H K4 Press
15:50
enter key This one C HK5 Press enter key Right now here
15:56
select this one uh strawberry This one quantity right you have select STW quantity
16:04
Press enter key Second one M This one m a n quantity Manga quantity
16:12
Right This one we have to vanilla I got name is bank quantity
16:19
This one you have to name it as choco quantity CO quantity Press enter
16:26
key This one name it as C This one can name it as C f quantity Right You have
16:33
to change the name Look like this Right You can change the name whatever You have change the name location right
16:39
contact It's very easy to identify the uh this two right now let's go to the
16:45
double click on that button here we have to right first I'm going to check first check box if check one chk1
16:56
dot check
17:01
if it is check checkbox one I'm going to write here name equal
17:08
name equal this strawberry I'm going to paste it here right here inside here
17:15
right if it is I going to this name I'm going to assign it here this variable
17:20
this name I'm going to assign it here if the user select check this after that write a quantity
17:26
equal int dot pass dot write here first
17:32
quantity key uh this one s quantity dot
17:38
value dot to string
17:47
right after that price equal
17:53
100 right price I just give as 100 yeah I
17:58
just uh you can put any price I just put as 100 right strawberry milk right after that total I'm going to calculate the
18:05
total I I create the total here How to calculate the total quantity multiply by
18:12
price So quantity what is the quantity I selected here What is the price of the
18:17
product it will be multiplied and display the total right total should be display on
18:24
this The total should be calculated and assigned to this variable Now this uh
18:30
total should be the all calculation should be added below the table here Right what is the item selected what is
18:36
the relevant price and relevant quantity and total right this all the stuff added
18:42
below Right if you select if you select the item and select the
18:47
quantity click add button is added Right so here what I'm going to do is here All
18:52
right that's the thing you have to do This one you have to write this this dot this mean the current form You have to
18:58
add the data grid view We have a data grid view one Data grid view one mean this is the name of the data grid view
19:06
dot we have to write rows dot add right that's the thing you have
19:14
to write now here what are the variables we are created
19:19
here we are assigned to the relevant things right relevant things right this is the name this is the text box field
19:26
price and all stuff we have to put it here we have to call it
19:31
This this we have to data grid view row admit this the this values are going to
19:36
add identity the data grid view row right second row mean quantity second is a second is a price right price right
19:44
copy paste price third one should be the quantity after the topic right that's the thing we have to write okay that's
19:51
only thing you have to write right now what I'm going to do is here
19:56
same thing you have to here you have Take select this one Select the quantity Click add button here Added successfully
20:03
here Right if you want to the size is not enough you have to increase the
20:10
table bigger The data get little bit bigger Now if you I can check
20:19
right Okay Now what I'm going to do is say the same thing
20:25
Ctrl C to copy Control V to paste below Check If I if the user select checkbox
20:32
too the relevant uh product should be mango
20:38
mango right this one should be a man I I select the I gave the quantity we have
20:45
selected cash here this one should be the man right okay right the price I'm
20:51
going to select this one as 80 right that's the thing we have to uh
20:57
third one same Control C only we have the different is name we have to change and price change and here quantity the
21:04
name should be same right just three stuff we have to do other stuff same C copyr past J we have third one third
21:12
checkbox what is the things vanla so we have to write the vanla stuff so vanla
21:17
here vanla so vanla milk right control copy to paste here right this one should
21:24
be I have to w quantity 50 panlam mean 50 right after
21:31
the same thing control copyr fourth check box the user select fourth checkbox
21:38
fourth one should be chocolate milk control copy control V to paste here
21:43
this one chocolate milk the quantity I have given as we given as cho right
21:50
chocolate I'm going to 150 right right okay all the stuff required final one
21:56
should be converted copy cannot be past here this one should be five right here I'm not write the else part here only
22:02
all the stuff why why I put all the stuff mean uh if you select more than
22:08
one item in the checkbox click add button it add all the things in the
22:14
data grid view you can select more than one item so that you have to write if if if right if you put else you can add
22:21
only one item into the data grid view right understand the stuff right Okay
22:27
this is very easy stuff Uh now what I'm going to do is see here final stuff is a
22:33
coffee name Ctrl C to copy here paste here This one C
22:39
uh what is the name i have I'm not remember of the name Select C H O C O F
22:46
C O F C right this one should be the 70 right that's it that's the thing you
22:53
have to right you have to master you have to consider this all the stuff you have done perfectly uh after consider
23:00
all the stuff perfectly now what I'm going to do is here we have to do the another stuff is we have to uh calculate
23:05
the total final total amount final total amount mean this one this one all the
23:11
stuff you are calculating Okay it's working
23:18
I put all the stuff uh like this You can check here whether it's working or not
23:24
Here it's working for perfectly Now here we have to calculate the final total here
23:31
Okay So if you all the values are displayed here Uh what are the things
23:38
available all the things are calculated and display the final total here So how to calculate this
23:43
go to the double click on the add button Now here I'm going to create integer
23:49
variable uh sum int sum equals zero Right after that we have to write write
23:55
the for loop for integer variable We have to create I
24:00
equal uh you have to write simply int row
24:06
equals zero row less than
24:11
data grid view 1 dot rows dot count rows
24:17
dot uh count you have to write count rows dot count
24:23
right after that row ++
24:28
Right Now here write sum equals sum plus
24:36
convert dot2
24:42
in 22 here This one we convert this one as your data will be one dot rows
24:50
row dot cells
24:57
So write which portion you have to calculate uh cell number three dot value right here What's the meaning of cell
25:05
number three mean this one 0 1 2 third position we are going to calculate So we
25:10
have to sell position three we have to calculate it display the total at here
25:16
So we have to change the textbox name txt dot
25:23
this one txt pay
25:29
this one txt bell right now here what I'm going to do is
25:35
here go to the here you have to write txt
25:42
txt txt uh dot
25:47
dot text equal sum dot to string
25:54
right now let's check the things right we display the total at in this text box let's check
26:11
it's working perfectly if you want to increase the size you can increase the size here a little bit Select the check
26:18
box Select these three text boxes we have to
26:23
increase Hold on the control key down there
26:34
Right Good Now what I'm going to do is see after that uh after we get the total
26:40
here Now we can check the font size increase size You can check here It's working perfectly Now what I'm going to
26:46
say after that uh we are going to calculate the another stuff is uh remove
26:51
row right So remove row mean this one When you click the delete button this entire row has been deleted uh the total
26:59
should be reduced So what I'm going to do is very simple one Uh the data grid view content click So click on this one
27:06
here Go to the event Select the data grid view Go to the event here We have to here sell content click So you can
27:14
double click on this one Here we have to write the code So here we have to write here is if argument key mean this this
27:20
one dot column index equal data grid view
27:26
one data grid view one dot columns uh columns uh columns
27:35
dot columns
27:40
That's the columns columns right columns you have to write here delete
27:48
you have to write the delete you have to write the delete uh delete dot index dot
27:55
index here you have to write and sign you have to write here e dot
28:01
row index you have to write here greater than equal to zero you have write like
28:08
this greater than equal to zero you have Write like this It is a greater
28:13
than equal z You have to write here uh data grid view
28:18
one valley uh you have to write uh rows
28:26
rows dot primo Here we have write
28:32
data grid view one dot rows
28:40
e dot row index write like this Okay Now here we have
28:47
write uh we have the same thing you have to write after delete remove the row If you clicked on this remove the row the
28:54
same thing you have to control C the same function the same thing Okay Control Copy Control Baste Right Once
29:00
you delete the row what happen is what is the total available here Once you
29:06
remove this one it is uh display the total here Here If you select this one there will be the two things Mango and
29:14
this one If you click this add successfully if you remove this one this only the remaining stuff This total
29:19
should be calculated and display here That's the top We have to put it here Okay This very simple The delete mean
29:27
this one What is the name you are given here delete button While you are creating the delete button we gave the
29:33
name here Here delete We gave the name as delete Here that's the thing we have to give
29:40
here Then only it it should work Right what is the button it should identify by
29:45
the name Right after done the stuff we'll do the another task is uh we add
29:51
the after do the task everything fine uh we have to calculate the uh if if one
29:58
the person pay the bill pay the amount balance should be displayed right so how to do the task is we have to write this
30:04
one into the add button so uh sorry print invoice button so double click on the print invoice button here we have to
30:10
write the code right so here we have to write here is uh very simple you have to write here uh print invoice you have to
30:16
write int uh first what is the this one should be
30:21
the pay amount this one should be the total Pay equal you have to convert int
30:28
dot pass first text box name this one should be a pay dot text
30:35
right you have to have the same thing copy convert b this one should be the
30:40
pay uh uh pay amount this one should be the total total
30:46
is this this one tot okay now here we have to uh get the balance it balance
30:52
equal uh pay minus to dot
30:58
minus total Right here we have to display the balance at which text box txt bell
31:04
txt bell dot text uh equal we have to write balance dot
31:12
dot call the two string method right now Okay let's check
31:26
payment You have to pay like this You have to click print invoice total should
31:32
be displayed This at the same time you have to display the print invoice Right so but now all the stuff are uh uh done
31:40
successfully Now we have to add the uh uh data into the table right So we have
31:45
to add the uh if you click print invoice the data should all the transaction should be saved in the database At the
31:52
same time uh we have to release the print receipt in uh crystal report So how to do the task it's very simple Uh
32:00
we have to write first one we have what I'm going to receive We have to go to the uh go to the database right So we
32:05
have to create two database Uh so we have to I have opened the Microsoft uh
32:11
SQL management studio I installed SQL Server 2012 I'm going to connect this
32:16
admin 1 2 3 Right here I have while installing the database I have creating a SQL authentication Username is
32:24
password Here we have to connect it It's connected successfully Now select the database I'm going to create the database New database as milk You have
32:30
to create a new database as milk I'm going to create So right click new You have to write a milk milk database milk
32:39
right your database is creating uh after created the database what I'm
32:45
going to do is here this is the database I have created two tables first one should be the uh sales table
32:53
second one is a sales product table sales product uh sales table consist of ID
32:59
it it should be uh integer id should be integer uh you have to write int
33:07
Right Int here we have to with auto increment You have set the auto increment Go to the property below ID
33:14
specification You have to select hash Yes Right After that we have to write the subtotal Subtotal we have to given
33:23
here as uh subtotal here Right so here we have to write decimal The subtotal
33:29
here is decimal to 0.2 Right after that subtotal after that uh payment pay pay
33:37
also the same decimal decimal this is decimal value pay After that uh pay
33:43
total pay after the balance balance also we have to write like this decimal
33:49
two here also balance also we have to write as a two right now what I'm going to after create this one we have to set
33:54
the primary key value So select this id right click set primary key right click
34:01
save as the table name date you have to write as sales right first table name
34:06
right after that I'm going to create another table now select the table folder right click refresh right here
34:14
created successfully select the folder again right click new table I'm going to
34:19
create the new table as sales products so ID in int
34:24
this one should be sales ID Sales ID mean sales table ID The sales table ID
34:30
it goes here as a primary foreign key as a sales ID Right this one should be int
34:38
uh product ID This a product ID pr ID
34:43
This one should be a product ID int Okay Right here product ID you have to
34:49
write product name This one should be a name only Now there will be no ids here Only the name I passing So product pod
34:56
product name as a watch chart
35:01
right after that uh product name price
35:07
should be decimal this one too we have to check here after that quantity
35:14
quantity also we have to set this like this decimal like after that total we
35:19
have to set the total as
35:25
Right Perfect Now what I'm going to do is here we have to set the primary key
35:30
Select this one Set primary key We have to save the table We have to sales
35:37
products This is sales product table This one should be a sales product table Right Click okay Right Now if you click
35:45
the table and refresh it you have to successfully created two tables Sales and sales product table Right now let's
35:51
back to our project Right now first what I'm going to do is here uh I'm going to
35:57
uh here double click on the add button here I'm going to uh sorry this is a print invoice button Here we have
36:04
calculate the balance here Now I'm going to instead of writing here I'm going to
36:09
create a separate function here Public function for the sales Very simple stuff right instead of writing there public
36:16
wide you have to create a function as sales sales function sales uh sales save
36:23
sales save you have to create a function sales save right this function what does is it saved all the data into the
36:29
database right this function what does is all the data save in the database right okay here you have to comment it
36:36
save data data right we have to write the comment right Okay
36:43
you have to write a common type right So here you have to write first part I'll do is here first we have to
36:52
uh this relevant fields you have set into the variables right this all the fields we are set into the variable
36:58
simple we have set here we here I'm not going to calculate anything else only we
37:04
have to save the data into the database so we have to write string if you calculate the values you have to
37:10
write the integer okay these fields right I only do what does you have to uh store in the database So you have to
37:16
write string tot you have to write txt
37:22
dot dot text first what is the total available it assigned to this text this
37:27
variable after that you have to create another variable string uh uh start pay equal txt pay dot text
37:40
right what is the payment it should be here after what is the balance amount
37:45
string bell equal txt bell dot text
37:50
right okay it it all strings are assigned to these variables okay after
37:56
that what I'm going to uh do is here I'm going to uh create the another thing is
38:02
a uh this one you have to create a SQL query you have to create two query so
38:09
you write string SQL one this is query one you have to create two queries SQL two query you
38:17
have to create two queries SQL 1 SQL 2 queries right so after that write SQL command SQL command also you have to
38:23
write SQL command you have to already write okay SQL command also you have to write okay so what I'm going to say here
38:29
first we have to write the name face first so string system dot data uh SQL
38:38
client you have to write the name face first right that's the thing you have to write the name face first After that we
38:44
have to write the SQL connection here So we have to write SQL connection Then only we will be if you
38:51
write the name face correctly then only we have to access the classes inside the name space SQL connection equal new SQL
38:58
connection Here you have to uh create the data path Right So how to write is here we have write simply data source
39:05
data source equal dot mean it it is it recognize the
39:12
local machine This is a local PC So that dot mean what is the name on the on on
39:17
this uh local machine making it's get right what's the name on the PC it will be getting right that's the thing in
39:23
block right so here we have to write initial catalog so you have to write the spelling need tell catalog right you
39:31
have to write the proper spelling okay without a mistake then catalog
39:37
catalog equal what is the name of your database you have to provide here milk is my database so it's a milk is my
39:44
database here milk is my database m
39:50
I I wrote m okay that's a mistake so by mistake I have written so I have to write m i a m
39:58
double l right that is my by mistake right so that's no problem after that you have to write user ID equal s right
40:07
password equal this is the username and password for while uh login the SQL
40:12
server admin mean 1 2 3 right so this a database connection right okay you have
40:18
to write colon to complete that right okay that's the database connection after that try to SQL command so SQL
40:25
command you have to write cmd1 you have to write two commands
40:30
cmd2 right that's the thing we have right perfect right now let's do the remaining
40:38
stuff what is errorql command right command Right
40:46
now here what I'm going to do is here you have to write first you have to get the SQL query string here this one SQL
40:53
variable first SQL one so you have to write the first query insert the data into we have to we have a two two tables
41:01
we have to one insert query we have to save both tables into the record so
41:06
first SQL code you have to get it here you have to write here
41:11
first we have to save insert these values into the database Right so insert into
41:17
which table you are going to save the records Sales table Uh you have to what are the columns available you have
41:23
specify the columns column names So right click and select all subtotal pay
41:29
balance You have to write here subtotal
41:34
pay bal What is the name you have given here the same name you have to give here
41:40
Then only it should work right Balance right values
41:46
So we have to write what are the values right so we have to write the as a parameter we have to pass a parameter
41:52
Same thing C copy control B paste here to pass as a parameter like this Very
41:57
simple one You have used write like this Okay After that what I'm going to do is
42:02
say balance uh we have to write a select
42:09
you have to write identity you have to create the last insert id here right so
42:14
you have to create the identity field here you have to write a identity you have to write like this identity okay
42:20
you have to write like this you have to put the entity you have to end it here as well this is the statement you have
42:26
to write last inside you have to create right after that you have to open the connection on open
42:34
after that we have to write a cmd one first one equal
42:40
you have to create the new command to create the object
42:45
cmd object you have to test first SQL connection and query So first you have
42:50
to select SQL one this query with which connection this connection
42:58
with this connection object you check both queries and connection are correct if is both are correct record is insert
43:04
into the database correctly okay that's you have to write okay right now first
43:10
what I'm going to write pass the parameters cmd1 uh cmd1 dot uh
43:15
parameters dot add value add add with value here we have to write these
43:22
parameters right so first we have to write this sub total the same thing C to
43:27
copy control B to paste here comma we have to write them this one first we have to this is applicable applicable
43:34
for this one tot mean right this is support for tot what is the total available here this is
43:40
coming here it's putting here it goes here it is goes to this row that's
43:46
that's how it's work control copy the same thing you have to write payment control seat copy control balance
43:52
control seat copy the same thing here pay this insert with the balance control se copy this this how we have to write
43:59
okay after that we have to write int last
44:05
insert id insert id get insert ID equal
44:11
int dot pass write here in dotpass you
44:17
have write cmd D dot execute scala execute scalar method you have try to
44:22
execute execute scala method right it is a it is for the generate the last insert
44:27
ID right so two string you have to create like this very simple stuff to do okay very very simple stuff last insert
44:35
ID right this how we have to get the last insert ID okay cmd1 right now I'm going to prepare for the second call so
44:41
second one should be a string p name product name should be there p
44:47
name is the product name should be there After that you have to write the int
44:54
price equal zero After that int
45:00
quantity equal zero After that int
45:05
equal zero You have to write like this Write like this After that we have to
45:10
write you have to write you have write you already the problem is to you already have a variable talk So we have
45:17
write total your change as total So rename is total right Okay
45:25
Now what I'm going to do is here we have to write for loop So we have to say what are the values available in the table
45:31
Right all the table consists of more values more than two or more than uh one
45:37
row in the table So we have all the table values we save save the record into the database So we have to write
45:45
the for loop and save otherwise we won't save So we have to write int row equals z
45:53
After that you have to write row less than data grid view 1 dot row count
46:00
rows dot count row ++
46:08
right now here what I'm going to write here is uh what is the problem here total
46:20
the already bloody defined scope dot
46:30
ah here we have to write here sorry we have this one to dot change this one dot this one dot so the
46:38
same name you have defined two t right this one is raining Rename to talk
46:45
Rename to talk here Rename to talk Right here also we change Okay
46:51
We just remove the stuff and rewrite again If I get that problem to rewrite
46:56
again right now it's okay Okay Now the problem is okay Right if you write the same name
47:02
it is a problem So you have to give the different name Okay
47:07
Now here you have write product name The same thing you have to write product name First we have to write product name
47:13
data grid view one dot uh rows this row
47:19
Copy V paste here dot sales you have to write here zero
47:26
dot value dot two string
47:32
first one after that you have to write the second stuff same thing copy to paste here price
47:42
Uh here we have to write the price means integer So convert them as here as in
47:47
dot if if you write the integer value here you you must convert them So you write in dot pass to convert them uh
47:55
cell number one Cell number one means 01 price Okay After that you have to write
48:02
quantity This quantity Q quantity this one should be two other
48:10
price uh quantity tot uh total distort
48:17
three right that's the thing we have to write
48:22
after that we have write the second SQL query for insert the recording into the database so the same SQL query we copy
48:29
control C copy paste SQL2 to created two write here insert in which table you are
48:36
going to save the record sales product table sales product table consist of the this row right id should be always auto
48:43
you don't need to write other rest of the fields you have to write sales ID product name per name price quantity
48:50
right we have write here sales ID
48:58
p r o dot name
49:04
sales ID product name price quantity price comma quantity comma dot
49:14
right now here same thing you have totrl C to copyr
49:20
to paste here write a parameter you have to make as a parameter here
49:28
right that's the thing we have to write here now what I'm going to do Here we have to write the same thing You have to
49:33
we don't need this one We have to remove the stuff All right You have to remove the stuff
49:39
here Now here we have write uh open the connection here We already open the
49:45
connection We don't need to write again They open the we already open the connection We both are the same ad So
49:52
cmd this one should be the cmd2 This goes cmd2 We have created this uh SQL
49:58
command 2 Right This is SQL command 2 right if you write different SQL command it is easy to identify the query right
50:04
SQL command to we have to connect uh SQL 2 query
50:10
comma connection connections are same right connections are same right the same the those two tables are reside on
50:16
the same database connection that right sales table and sales product table the both tables should be reside on the same
50:23
database which is a MILK right so that connection should be same for both right
50:29
okay after that what I'm going do is here we have to write uh right now here what I'm going to say we have write uh
50:36
cmd2 dot this same thing
50:42
write the same thing control copyr this one two command two you have to write here uh second sales ID sales ID control
50:50
copy control V to paste here you have to write here is sales ID mean this last inside ID as a sales ID control Copyr
50:56
paste here or the same thing Copy control V paste Right This one should be a product name
51:04
Control seat copy control bit paste here Price control seed copy control bit paste here Quantity control seat copy
51:10
control bit paste here Total control seed copy control paste here Now here the same fields we have price This is
51:17
last insert ID Product name This one paste here Price
51:24
paste here Quantity paste here Total paste here Right So here the the
51:30
relevant fields set the parameters and these are the values uh cell zero what are the values it's assigned to this uh
51:37
cell zero mean this cell zero what are the values available it assigned to this variable price assigned this quantity
51:43
and total assign these two we are passing here last inside ID what is the last inside ID are coming when you add
51:50
the record what is the what is the ID of the record this ID should be coming here as a sales ID so for right here this is
51:58
As right side generated is here created by this select addition right identify
52:04
right just a simple accordingly right after done the stuff we have to
52:09
now here we have to write uh execute method cmd2 dot execute uh nonquery you
52:16
have to write then only record execute non-query you have to write like this okay then only record error into the
52:22
database now here we have to pass a message as message box you have to write messagebox dot So you have to write
52:29
sales completed Sales completed
52:36
doesn't think you have right now Let's check this one
52:42
Mango Click add button Pay the amount
52:48
Print invoice Click print invoice button
52:55
Let's say uh column id table make uh sales
53:02
here What is the can't insert the value null into the ID
53:08
what's the problem here sales product table What's the problem
53:13
sales product table uh design What I did here i think here I
53:20
didn't right here What is the problem is the ID
53:28
field I didn't set the sales product table the ID uh the
53:34
ID column data type I didn't set as a auto increment that's why the problem is
53:40
arise so select the go to the table uh sales product table select the data type
53:46
ID specification you selected yes right now that's why the problem is came right
53:51
what's the error you came you must read the error then only you get solution for it right that's why it say the record
53:58
the error display ID should be null okay now let's check click start
54:07
strawberry one milk mango one click add button pay the amount click print
54:13
invoice sales completed now let's check sales table
54:19
this one this is the old one we have to remove them because uh uh when Here are the first things I have the testing
54:26
purpose You have to write here You have to write the sync Select this one X2 We
54:32
have to remove this We don't need that This the first one This one should be the first one here Your sales product
54:38
table We have to check here This sales ID This is sales ID Three Sales ID This
54:45
is ID The same sales ID coming here as a
54:50
same ID coming as sales ID 33 The same three 33 products This is the products right sales ID right the sales ID This
54:57
is the invoice number This is the meaning of the invoice number right okay
55:02
Okay guys I hope you understood the things well In my next tutorial I'll be
55:07
teach to uh create the KA report for this Okay thank you for watching If you
55:14
like my channel please subscribe me like me Thank you for watching Hi guys welcome to Tutors Funny channel
55:22
In our last class we saw the all calculation part of the point of sale system Here in this class I'm going to
55:29
teach the crystal report receive printing Right So first I'm going to go to add the another form for the print So
55:37
select project add windows form This form I'm going to create this one
55:44
create as print dots Right It's a print right Okay That's a print Right Perfect
55:51
Now here what I'm going to do is here go to go back to my project here
55:56
this is a print invoice button here when you click print invoice all the
56:02
calculation will be done and data should be saved in the database at the same time print receipt will be generated
56:09
right so here after done this message you have to call the print receipt so
56:16
what I'm going to do is here first I'm going to go to uh at the crystal report
56:22
to uh uh document So how to download the crystal report it when you install the
56:27
visual studio it is not uh on the toolbox right you have to download that
56:33
right So how to download is just go to the this website right you have to go to
56:38
the Google and type this one uh you can access this website this is a website you you can download it here crystal
56:44
report right if you click crystal report link here there will be the crystal report part available right here you can
56:50
download here right installing crystal report how to download crystal over here you can download it's the latest version
56:56
you have to download how to download crystal report for windows 9 here right
57:02
here if You come down there will be the link right here There will be two choice
57:07
developer edition and run runtime downloaded You don't download this one You have to download developer edition
57:13
Download right Developer edition mean you are the developer Right if you click this uh link it automatically it's
57:19
downloaded Right you are the developer So you have to download the download developer link here This one right so
57:25
these are the versions supported for this one uh developer Right the 2010 12 all the versions should be supported
57:31
here you you don't have any problem You have to install this one right very simple After installed uh you have to
57:37
close your visual studio You have to reopen it If you reopen it go to the
57:42
toolbox You can check whether it is it is uh it is add your report or not Here it's
57:49
added successfully after install and reopen the visual studio here Okay Okay After downloaded you have to install the
57:56
crystal report in your system After installed you have to restart the visual studio then only it will be adding into
58:02
the list right under the report you it is uh added in the uh uh list
58:08
successfully like look like this right now what I'm going to do is here uh back to my print uh here this one
58:16
right print dot CSS this page this is crystal report now I'm going to drag right I just size like this now let's
58:24
drag the report this one crystal report view right you just drag and
58:31
Right if you drop it is added into the form right is it look like this okay now
58:36
what I'm going to do is here first I'm going to go to the select the project
58:41
this is my project right click first I'm going to add the data set first right first I'm going to add the
58:47
data set first right that's the thing we have to do so go to the add new item
58:53
data data set right the data set I'm going to load these two tables which two
59:00
tables I'm going to load I'm going to load these two tables sales table and
59:05
sales product table we have to load right so how to load is first go to solution explorer here this is a
59:12
solution explorer here we have to right click select this one add connection
59:18
dot means a local machine SQL authentication sa is a username
59:25
admin 1 2 3 is my password Now you'll be able to select the database here My database is
59:32
this one M I L key Right You can check that connection is success or not Succeed Click okay Right now here uh
59:42
it's not comma It's not problem No problem Here your database is opened Okay This is your database Right Now
59:48
these two tables you have to drag here Add into the data set Right So first select sales
59:57
All right Second one should be the sales product Drag and drop here All right
1:00:02
These two things added successfully Now this this no need to this two stuff Select this one Right click Delete
1:00:11
Select this ad after this one Select this one only here This adding you have to select Right if you select all the
1:00:16
stuff it delete all the table Right so you select this one Eding Right select this heading Right click Really that's
1:00:22
it Okay After that after successfully done this build and rebuild solution is building right this rebuilds all
1:00:30
perfectly After that what you are going to do is here you have to create this report right so after data set is
1:00:37
created successfully you can you'll be able to see the data set here The data set right it's created
1:00:43
successfully This data set created after data set is created successfully I'm going to go to create the crystal report
1:00:49
So select the uh project right click add
1:00:56
new item here you have to select the this one reporting select the crystal report uh
1:01:03
you have to give the name whatever name here I leave it as default one click at
1:01:09
right here it ask for this one select the standard one uh okay here you have to don't select
1:01:16
this options you only select the project data this one this project data you have to click on the expand this one here
1:01:23
ed.net Net data set I have created the data set So this the same data set I'm going to get it here Uh here milkshop is
1:01:30
your project name inside the milk milkshop project We have a data set data
1:01:35
set one is there Uh data set consists of two tables sales and sales product
1:01:40
tables So we have to get them both So first you have select sales table Second
1:01:46
sales product table Right After the next uh it is uh you have to unlink unlink
1:01:52
this link So here this one should be the uh sales table sales product table Click this link Right click delete link Click
1:02:00
next After that here it ask to
1:02:05
uh what are the fields there So we need all the fields right sales and sales product table All the fields we needed
1:02:11
We have to import like this After that click finish That's the thing we have to right now your record is created
1:02:16
successfully Now we have to arrange them right here the uh subtotal pay balance
1:02:22
all the stuff are coming under the product under here right okay now here what I'm going to say we have to do the
1:02:28
stuff we no need this ID we have to remove that click delete the this one no
1:02:33
needed subtotal we drag later uh subtotal we have to arrange like this so here what I'm going to do is here I'm
1:02:41
going to group this one so select the group name field this one right click insert group
1:02:47
here Insert group uh sub to this one Okay here click We added the another
1:02:53
group here below here Here another group in this group I'm going to drag the sub
1:02:58
total all the stuff right So here this sub total here this one all stuff you have to drag here This sub to you drag
1:03:06
like this here Simply you drag here Right Second one should be the pay This
1:03:12
also drag here This one should be the heading This one should be the data right you have to understand first what
1:03:17
is the data what is this one should be the data right detail section data header section is heading right okay if
1:03:24
you want to uh change this one as a sub you can you'll be able to send if you need to
1:03:31
starting the letter should be uh capital you made here don't data you you don't
1:03:38
change this one if you change this one it won't work right this is coming from the database this is jummy text right so
1:03:44
here we Write like this This is a text Right Okay Now you'll be align all the
1:03:49
stuff you can done right here After that balance
1:03:56
is a balance right arrange them like look like this Okay But arrange them look like this A simple receipt
1:04:02
print for the terminal printer So you set like this After that we have to do here This is a group name We no needed
1:04:08
Select this one Delete key Press delete key No data there Right So only here
1:04:14
after that we have arrange here uh we have to get the spaces So here ID we
1:04:20
this field we no needed we remove them We need uh sales ID This is coming for
1:04:25
the heading Sales ID is a uh column as a uh invoice number So what I'm going to
1:04:30
see here say add a header field I'm going to put it this one A print date we
1:04:37
have to put it here We need a print date here This automatically coming sales ID have put
1:04:43
is a data right so sales ID data right okay We have arrange like this Right so after that what I'm going to do is say
1:04:50
uh [Applause] right you have to write this you have to
1:04:56
see the right sales ID right right now here first what I'm going to you have to
1:05:02
arrange them this one is a heading right so heading we have to sales ID you make
1:05:08
above this one here right this right here this heading this also we have to
1:05:14
drag above like this Right now here what I'm going to do is see this one you have to arrange them
1:05:20
This is a product name So product name you have to arrange them here So product name
1:05:27
you have to arrange them You have to get the time and do it It's you can't do
1:05:34
quickly Okay You need a time to arrange a receipt Right so it is good Right we
1:05:39
need a time you drag like this Okay So right simple receipt you have to make like this This is very simple You have
1:05:46
to make like this Now after that we have to make the size here Right Okay Now here if it is now here we have to reduce
1:05:53
the size right Reduce the font size and everything Uh here we have we need adding So that here this this is our
1:06:01
sales ID This is this one we adding we need a header section So here we need a space
1:06:08
Right Right Right Now here so print date sales
1:06:17
ID we need heading so we have to how to put the heading of above I I put some
1:06:23
name right I put the name as go the toolbox and write the text object here t's funny this is my name is tut's funny
1:06:30
I just put as a t's funny otherwise you have to put your milkshop milkshop
1:06:37
it right milkshop right select this one if you want to change the text sizes
1:06:42
everything you done by here if If you want to increase the font size also here font size is default come here I'm going
1:06:47
to make this one as a with b 12 you can otherwise you can access as a
1:06:54
14 also you put right change them like this
1:06:59
You'll be able to uh change the font sizes as well If you want to change willing to change this one as like this
1:07:06
Okay Otherwise you have to change monotype It's a you have to type as a monotype is a
1:07:14
monotype type This is a very good stuff for
1:07:19
making monotype It's uh if you you can check okay there been various font sizes
1:07:25
are there So font styles are there you have to check it check and import one thing right So I have put like this uh
1:07:32
italic right bold right Okay Now you have to check check and put one one thing right So right no problem Right
1:07:39
Now this is the stuff we have to to right right after that I'm going to arrange
1:07:45
the stuff So we have to arrange the stuff as this is for the terminal printers You have to arrange the size
1:07:50
It's a very small print receipt we needed So we have to arrange the size like this It's very important stuff Size
1:07:58
is very important stuff So we have to the font sizees all the stuff we have to change it Uh we have to change this So
1:08:04
all the stuff has been you have to select all the stuff right all font size we have this all the stuff right you
1:08:11
have change it as eight at eight so here we have to this one
1:08:16
should be then only it will be arranged simply eight this also be
1:08:29
[Music] like this a total
1:08:40
right And we have to select this one
1:08:52
Right now this is the stuff right now we have to arrange them This all the stuff Select all on select all Alt on the
1:08:58
control key down on select all You have set as a left align here
1:09:03
This also select all on the control key down Select all Left align Select all
1:09:10
So left align you select as left align This will select all You have to select as left align Right this also select as
1:09:19
left align You have to select all the stuff as left align Right simple Right all the stuff Right simply you have to
1:09:25
select all Right now what I'm going to do is here we have to set up this also
1:09:31
We have to arrange the sizes the output This is
1:09:42
take the time and do it then only it is you can get the nice visit right you you need a time to do it okay now let's
1:09:50
change the uh paper size so go to the crystal report
1:09:56
design page setup this is a terminal printer so three
1:10:01
horizontal vertical four Click okay Now you'll be check it is arranged successfully Okay It's problems No
1:10:08
problem Right Right It's okay Now we need another stuff You can check the here it's
1:10:15
working fine All stuff should be working fine Now here we have to do the another stuff is uh here we have to put it one
1:10:23
message here Thank you Come again Some we have to write here is
1:10:28
toolbox text object thank you
1:10:35
come again All right Okay Now you can check here
1:10:41
You have to this one You have to write like this Okay Now you have to if you need bold
1:10:47
you can bold it If you change the font style you will be able to change here
1:10:53
You'll be able to change the font style like this Right Very simple here This this font is very diff uh very this one
1:11:00
you have to change the spelling you have to make this all the
1:11:06
heading as first error should be capital
1:11:12
right okay only the heading don't make it as this one also capital okay this
1:11:17
also coming from the database right if you make it as simple uh capital it won't work right this is the heading
1:11:23
this is a details right details you don't make this is the details this is the heading Right This is this is this
1:11:28
is the right identify by the here this one lines right if you want to select
1:11:35
all you have to underline you have to remove it this one also select all underline you have to remove it right
1:11:40
now it's perfect perfect stuff to done if you change the this font it should be
1:11:45
perfect all the text will be selected you have to make it as this one
1:11:55
right simple Very nice print receipt You have to change it You can check here Very simple
1:12:02
print You can check here Right Uh if you want to change the font size as little bit bigger you change this one as a 10
1:12:10
All right Perfect So very perfect You can check here after done it Right It's
1:12:15
very simple font Right But this one also we have to change the the same font
1:12:23
also and we have to put it as a 22 some sizes
1:12:29
right it's very simple it's very nice right now what I'm going to do is here
1:12:36
uh we have to check it right very simple right this is simple receipt right now what I'm going to do is here uh we have
1:12:43
to this here we need another stuff is we have to Arrange the B this
1:12:50
spaces we have we have to cover this one as well inside here every data we have to go to the toolbox line we have to
1:12:57
send line object draw the line right for line uh property we have to
1:13:04
arrange them right click format object you have to single line or double dash
1:13:10
dot you have to arrange them with dot you have to select dot you have to put it right now here you can change third
1:13:15
dot a dot It's very simple right very simple We have to write right after that you have to do another stuff is uh
1:13:25
[Music]
1:13:32
you have designed the receipt look like this Okay After that I have to connect this uh receip into uh my here right my
1:13:40
project right so how to connect this very simple First we have to uh when you print the receipt we have to send the
1:13:47
last inside ID into the print page right that's the thing we have to do so first what I'm going to say go to the print
1:13:53
page this the print page right this this one right here so here first what I'm going
1:13:58
to do is here uh I'm going to go to the uh page load right page when the page is
1:14:04
loaded the receipt should be loaded so how to at the page load is uh go to here event
1:14:11
this is a uh for uh form form event load double click load right it's load okay now here first we have to what I'm going
1:14:18
to say here uh we simply we have to get the values first we have to write the
1:14:24
same thing uh SQL connection so go to the first form right I click view the
1:14:29
same connection we have to put it here the name space SQL connection class C to
1:14:36
copy back to crystal report sorry uh print
1:14:41
yeah we have to paste it paste it here You have to import the name space SQL
1:14:46
name space using system data.SQL client This is must The name
1:14:53
space is must Okay Then only it access the class Uh after after done the stuff
1:14:58
you have to do the another thing is uh you have to write this SQL command
1:15:05
SQL command command object also you need it right So SQL command So where do this instead of writing we just copy and
1:15:11
paste the same two command we needed so paste it here right that's the thing right uh now what I'm going to get the
1:15:18
values right so we are sending the values uh last insert ID we are sending uh relevant ID what is if you done the
1:15:25
sales if you done the sales what is the last insert ID of this one this is as a
1:15:30
sales ID the sales ID uh goes to the print page so that that that has a
1:15:36
invoice number so this is the sales ID So this last sensing to which page this
1:15:41
page print page So how we are retrieving how to retrieving is you have to write
1:15:46
here simply you have to write a function here You have to write simply you have type here prop p r o f c o p full You
1:15:57
have to write like this right here If you write full
1:16:03
press tap key on your keyboard two times it generate the properties right You
1:16:09
write prop full after ro you have to press tap key on your keyboard two times
1:16:14
it's automatically generate the get and set method right get and set uh for here
1:16:20
right get and set method it's automatically generated okay okay here we have retrieving the values so here we
1:16:26
have to write this one is a ID sales ID sale ID here also we have write this one
1:16:33
also sales ID you have to write sales ID you have to write like this is a function sales ID right So the sales id
1:16:38
has set it successfully Now let's back to my form one Here we are sending the value First you have to get and set
1:16:45
method You have to set to uh print page So after that you have to make the
1:16:51
sending values So right after uh sales is completed what you have to
1:16:56
do is here we have sending the value into which page that page After what is the form name you are
1:17:02
sending print dot CSS print Which page print page This print
1:17:08
page you send print We have to create the object P equal new print
1:17:14
Here we have to write [Music] P dot
1:17:20
sales ID Sales ID mean this this sales ID right sales ID
1:17:27
equal CS what what is the field we are sending this last inside id fun uh
1:17:33
variable this one right you have to write the last inside ID this one you have you have created here control copyr
1:17:39
paste here you're sending to that page right after that what I'm going to do is you have to write
1:17:45
uh pow show right that's the thing you have
1:17:52
finally we have to close the connection as well we have to open the connection we still we didn't close the connection
1:17:57
finally we have to conduct close close the connection right after stuff you have to close the connection right this
1:18:03
is the things you have need full things you have to do uh after that you have to receive the ID here this page right this
1:18:10
receive after receive the ID is it is simple uh the sales id is coming from uh
1:18:16
sales id okay so here we have to retrie the sales ID
1:18:21
uh in this page right now here we have to this is sales
1:18:27
sales ID right sales ID this is a field right this this sales ID you have to get and set right the sales ID you are
1:18:33
retrieving here right this is the sales ID okay here we are sending the sales this sales ID method we are sending the
1:18:39
last inside ID it's coming and you have to set it here get and set method it is
1:18:45
you have to call it this this variable right so what I'm going to do is say uh do is here now I'm going to write the
1:18:51
crystal report part I doing the crystal report part so loading so we have write open conopen
1:18:57
When the page is loading crystal report is loading right page CSS right so we have to write here You have to get a
1:19:03
data table Data table
1:19:08
create the object DT equal new data table Right you have to write the query
1:19:13
here You have to write cmd 1 equal new SQL command You have to create the two
1:19:19
SQL here Uh two SQL command here right so one is a sales table another sales
1:19:25
product table So SQL command So you have to write the first one should be uh select all from select all from sales
1:19:33
table Sales table where ID sales ID id equal
1:19:41
single quotation double quotation double quotation single quotation in between here we need two plus sign here we have
1:19:47
to pass this method Control C to copy B to paste What is ID coming here pass this method
1:19:54
Test stuff we have to do first right test stuff we have to do Okay Here we have to comma we have to pass the
1:20:00
connection object It is must connection database connection the database reside on here Right
1:20:07
So same thing you have after that you have to write we have to load the SQL data reader You have to load the SQL
1:20:14
data reader here Okay So you have to write here SQL data adapter SQL database
1:20:19
SQL data adapter drought
1:20:27
right here DR equal we have to create the object DR equal SQL data adapter
1:20:34
data adapter to pass a cmd comma cmd means SQL command cmd1
1:20:40
this command you have to pass it here that's it after the dr field dot field
1:20:45
you have to fill the table you have to put into the DD data table that's the
1:20:51
stuff you have to do the same thing you have to do the data uh same thing you have to do the sales product table as
1:20:57
well control C copy control B to paste here this one should be data table I'm going to make it as one this one select
1:21:02
all from sales product table sales product table what what is the ID we are getting here is sales table id uh as a
1:21:10
primary key it goes to the sales product table it it has a foreign key sales ID
1:21:16
Right if there is any mistakes you have to you don't understand that one here Yeah The sales this ID yeah goes to that
1:21:23
the same ID is generated in sales ID here Right that is a primary key It's is the same primary key available in the
1:21:30
sales product table as a foreign key Right you understand the concept well then only you will be able to do the
1:21:36
programming well Right so this one should be the cmd2 CMD2 this also the cmd2 right you call
1:21:45
it the DT1 this one right you have to make this one right okay this is very
1:21:50
simple stuff you have to follow okay to load the report in order to load read
1:21:55
the uh report right so this you have to follow the stuff right it's very important stuff once you open the
1:22:01
connection you must close it right after that what I'm going to is
1:22:07
here uh we have to connect it the crystal Crystal report So which report crystal report So you have to write uh
1:22:12
name of the report So crystal report crystal report
1:22:19
uh to this one equal you have to create the object uh CR2
1:22:24
just create the object what you can create any name of the object Okay it's not doesn't matter you have to create
1:22:31
the object CR2 Now here CR2 CR2 is object we have created dot
1:22:38
database dot tables we have to fetch two tables you have tables what are the tables you
1:22:44
have to put the names correctly sales table set
1:22:51
data source DT what's the data you set it DD this table
1:22:58
you have set it so same thing we have to do the second table copy I'm going to paste here sales product table
1:23:07
sales product table the DT2 that's it after that you have to write you have to show the report this dot
1:23:14
crystal report uh see uh dot crystal report uh where's
1:23:20
the crystal report viewer
1:23:25
crystal report viewer one dot report source
1:23:31
report source equal this object you have to pass what
1:23:36
is the object you create uh you have to pass it here that's it that's the thing this one should be dt one not 22 here
1:23:43
this one right okay that's simple stuff you have to do now let's check whether
1:23:48
it's working fine or not now let's click start strawberry I'm going to order one mango
1:23:55
milk order two click add button Here we have to pay the bill amount
1:24:01
Click print invoice Sales completed Message successfully Here it's working fine Here
1:24:10
it's calculated Subtotal pay balance should be there Here all the stuff there
1:24:15
But I have a problem is the receipt is not come to the full screen It doesn't matter It's very simple Uh it goes to
1:24:22
the your print p print form here This one Select this one This is a crystal report you
1:24:28
added Yeah Click on this tab here Display status bar Untick
1:24:36
here This one group tree This is a group tree We have to none Click on none Right
1:24:41
That's only you have keep the option display toolbox only This toolbox only Other stuff you have to off Right Now
1:24:47
you have to check You have to check one This should be one
1:24:55
Click add Click print invoice Sales completed
1:25:02
Now it's working perfectly here Now here field is working perfectly Right here if
1:25:08
you have any mistake you have to put it here Right here the date is not coming successfully Now here what I going to do
1:25:15
is here simply you have to arrange them very simple goes report uh main report
1:25:20
Here is one you have to arrange the report Uh print it little bit here Big right now it's working
1:25:26
You can check here it's full when coming right perfect right this is a very simple receipt we have to done after
1:25:32
that we have do when you click print invoice button we have to uh print the
1:25:38
receipt without show the print preview so what I'm going to select to go to the print form view code here we have to add
1:25:45
the simple code here this is the viewer you have to you can here uh you have to
1:25:51
write here is another simple code you have to write this object Copy And we paste here dot dot print to
1:25:59
print You have to call it like this You have to write here one you have to write like one comma false
1:26:07
comma 0 comma 0 It will be print Okay
1:26:12
Here if you call this like this uh if you want to hide this one and you have to print you outside the print you have
1:26:18
to print Now you can check here the print rece
1:26:24
Printing right if you click this one click print print inverse button
1:26:30
here it printed See it show here If the printer is there it will be printing Simple right it's very simple one you
1:26:37
have to done right very simple one right uh I hope you guys you understood the
1:26:42
thing well If you have any doubt on this lessons you can ask me anytime If you
1:26:48
like my channel please subscribe me like me Thank you for watching
#Jobs & Education
#Training & Certification
#Windows & .NET
#Computer Education