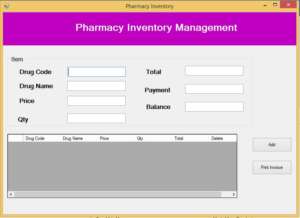
The Pharmacy Inventory Management System is developed using C#.net and microsoft sql server. The project is built to manage pharmacy items and transactions. To make a new transaction, fields such as: drag name, qty and payment needs to be selected. If you like to learn point of sales systems step by step, this is the right place to learn from the beginning. In this tutorial, we will learn crystal reports step by step and design and print receipts for the payments.
Search Record
The systm shall be able search the drag name, price by the relevant “Drug Code”.

Paste this Code inside the keypress Event of the textbox. we created the textbox name txtdcode of this project.
 private void txtdcode_KeyPress(object sender, KeyPressEventArgs e)
        {
            if(e.KeyChar == 13)
            {
                cmd = new SqlCommand("select * from product where id =  '" + txtdcode.Text + "'", con);
                con.Open();
                read = cmd.ExecuteReader();

                if(read.Read())
                {
                    string pname;
                    string price;
                    pname = read["prodname"].ToString();
                    price = read["price"].ToString();

                    txtdname.Text = pname;
                    txtprice.Text = price;
                }
                else
                {
                    MessageBox.Show("No Barcode Found");
                }
                con.Close();
            }
            con.Close();
        }
Add the Product details into the dataGridView
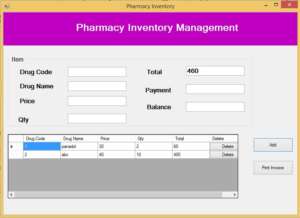
After receiving the drag name and price where the user has the option to add the qty by clicking the add button to see all Products details which will be shown in the below table.
 private void button1_Click(object sender, EventArgs e)
        {
            string dcode = txtdcode.Text;
            string dname = txtdname.Text;
            double price = double.Parse(txtprice.Text);
            double qty = double.Parse(txtqty.Text);
            double tot = price * qty;
            this.dataGridView1.Rows.Add(dcode, dname, price, qty, tot);

            int sum = 0;

            for (int row = 0; row < dataGridView1.Rows.Count; row++ )
            {
                sum = sum + Convert.ToInt32(dataGridView1.Rows[row].Cells[4].Value);
            }
            txttotal.Text = sum.ToString();
            txtdcode.Clear();
            txtdname.Clear();
            txtprice.Clear();
            txtqty.Clear();
        }
Calculating the Total and balance
Remove items
if you want remove items from the datagridview. select the row of table which item wants to. then click delete button in the datagridview.
 private void dataGridView1_CellContentClick(object sender, DataGridViewCellEventArgs e)
        {
            if(e.ColumnIndex == dataGridView1.Columns["delete"].Index && e.RowIndex >= 0)
            {
                dataGridView1.Rows.Remove(dataGridView1.Rows[e.RowIndex]);

                int sum = 0;
                for (int row = 0; row < dataGridView1.Rows.Count; row++)
                {
                    sum = sum + Convert.ToInt32(dataGridView1.Rows[row].Cells[4].Value);
                }

                txttotal.Text = sum.ToString();
            }
        }
After that create the method Salessave().we have to create two different tables to store data into the database. we also have to create the following tables from database.
sales tables consist of following colums – id,subtotal,pay,balance.
sales_products tables consist of following colums –id,sales_id,drugname,price,qty,total
public void SalesSave()
{
string total = txttotal.Text;
string pay = txtpay.Text;
string bal = txtbal.Text;
string sql1;
string sql2;
sql1 = "insert into sales(subtotal,pay,balance)values(@subtotal,@pay,@balance) select @@identity;";
con.Open();
cmd = new SqlCommand(sql1,con);
cmd.Parameters.AddWithValue("@subtotal", total);
cmd.Parameters.AddWithValue("@pay", pay);
cmd.Parameters.AddWithValue("@balance", bal);
int lastid = int.Parse(cmd.ExecuteScalar().ToString());
string dname;
int price = 0;
int qty = 0;
int tot = 0;
for(int row = 0; row<dataGridView1.Rows.Count; row++)
{
dname = dataGridView1.Rows[row].Cells[1].Value.ToString();
price = int.Parse(dataGridView1.Rows[row].Cells[2].Value.ToString());
qty = int.Parse(dataGridView1.Rows[row].Cells[3].Value.ToString());
tot = int.Parse(dataGridView1.Rows[row].Cells[4].Value.ToString());
sql2 = "insert into sales_product(sales_id,drugname,price,qty,total)values(@sales_id,@drugname,@price,@qty,@total)";
cmd1 = new SqlCommand(sql2, con);
cmd1.Parameters.AddWithValue("@sales_id", lastid);
cmd1.Parameters.AddWithValue("@drugname", dname);
cmd1.Parameters.AddWithValue("@price", price);
cmd1.Parameters.AddWithValue("@qty", qty);
cmd1.Parameters.AddWithValue("@total", tot);
cmd1.ExecuteNonQuery();
}
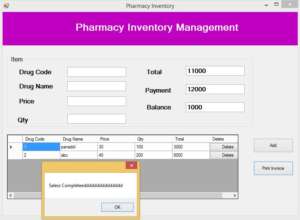
MessageBox.Show("Saless Completeeddddddddddddddd");
print p = new print();
p.Salesid = lastid;
p.Show();
con.Close();
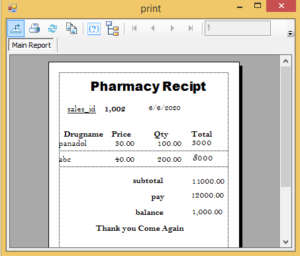
}Call the Salessave() method inside the Print Invoice button. after calculating the total Print receipt will be released. This print receipt is design by Jsper Reporting.
Paste this code inside the Print Invoice button
 private void button2_Click(object sender, EventArgs e)
        {
            double total = double.Parse(txttotal.Text);
            double pay = double.Parse(txtpay.Text);
            double bal = pay - total;
            txtbal.Text = bal.ToString();

            SalesSave();
        }
Print Receipt
i have attached the video link below. which will do this tutorials step by step.