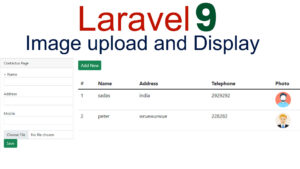
In this lesson we talk about laravel 9 image uploading and display the image step by step.Laravel is world famous php framework.it has various features.Laravel is a MVC architecture. In this tutorial will see how to make a Image Uploading and Display the image in Laravel 9. Here is the Best Place to Learn Laravel 9.
Install Laravel 9
Create a new Project type the command on the command prompt . I create the project name payroll
Laravel 9 Tutorial Setup the Project
composer create-project laravel/laravel my-app
After Type the Command you have to wait till the project has been created.
Database setup
Create the Database on xampp which name is dboffice
After created the database.
Change .env File
Change .env File for username, password and DB Name
After that run check the application the welcome screen of Laravel framework look like this.
php artisan serve
Create Migration
Create the tables
php artisan make:migration create_employees_table
Click and open it.
inside the function up() function i shown in below clearly.
public function up()
    {
        Schema::create('employees', function (Blueprint $table) {
            $table->id();
            $table->string('name');
            $table->string('address');
            $table->string('mobile');
            $table->string('photo', 300);
            $table->timestamps();
        });
    }
    public function down()
    {
        Schema::dropIfExists('employees');
    }
After add the lines type
php artisan migrate
Create Controller
Create the controller name which is EmployeeController
php artisan make:controller EmployeeController --resource
Create Model
Model is used to get the data from the database.
Create the Model name which is Employee
php artisan make:model Employee
After Model is Created the look like this. Code inside Model Class (app\Models\)
class Employee extends Model
{

    protected $table = 'employees';
    protected $primaryKey = 'id';
    protected $fillable = ['name', 'address', 'mobile','photo'];
}
Create Views
Create a Folder inside the resources-views
inside the views folder create the Employee folder
In Laravel you have create the pages using layout.blade.php
Create page layout.blade.php
<html>
<head>
    <title>Contact Laravel 9 CRUD</title>
    <link href="https://cdn.jsdelivr.net/npm/bootstrap@5.1.3/dist/css/bootstrap.min.css" rel="stylesheet" integrity="sha384-1BmE4kWBq78iYhFldvKuhfTAU6auU8tT94WrHftjDbrCEXSU1oBoqyl2QvZ6jIW3" crossorigin="anonymous">
</head>
<body>

<div class="container">
    @yield('content')
</div>

</body>
</html>
Create page create.blade.php
@extends('employees.layout')
@section('content')
<div class="card">
  <div class="card-header">Contactus Page</div>
  <div class="card-body">

      <form action="{{ url('employee') }}" method="post" enctype="multipart/form-data">>
        {!! csrf_field() !!}
        <label>Name</label></br>
        <input type="text" name="name" id="name" class="form-control"></br>
        <label>Address</label></br>
        <input type="text" name="address" id="address" class="form-control"></br>
        <label>Mobile</label></br>
        <input type="text" name="mobile" id="mobile" class="form-control"></br>
        <input class="form-control" name="photo" type="file" id="photo">


        <input type="submit" value="Save" class="btn btn-success"></br>
    </form>

  </div>
</div>
@stop
Create page index.blade.php
@extends('employees.layout')
@section('content')
    <div class="container">
        <div class="row">
            <div class="col-md-9">
                <div class="card">
                    <div class="card-header">Contacts</div>
                    <div class="card-body">
                        <a href="{{ url('/employee/create') }}" class="btn btn-success btn-sm" title="Add New Contact">
                            <i class="fa fa-plus" aria-hidden="true"></i> Add New
                        </a>
                        <br/>
                        <br/>
                        <div class="table-responsive">
                            <table class="table">
                                <thead>
                                    <tr>
                                        <th>#</th>
                                        <th>Name</th>
                                        <th>Address</th>
                                        <th>Telephone</th>
                                        <th>Photo</th>
                                </thead>
                                </thead>
                                <tbody>
                                @foreach($employees as $item)
                                    <tr>
                                        <td>{{ $loop->iteration }}</td>
                                        <td>{{ $item->name }}</td>
                                        <td>{{ $item->address }}</td>
                                        <td>{{ $item->mobile }}</td>
                                        <td>
                                            <img src="{{ asset($item->photo) }}" width= '50' height='50' class="img img-responsive" />


                                        </td>
                                    </tr>
                                @endforeach
                                </tbody>
                            </table>
                        </div>
                    </div>
                </div>
            </div>
        </div>
    </div>
@endsection
Controller
After that Pass All view pages through Controller. you have to add the Model namespace here
use App\Models\Employee;
Data is coming from the database via Model.
<?php
namespace App\Http\Controllers;
use Illuminate\Http\Request;
use App\Models\Employee;

class EmployeeController extends Controller
{
    public function index()
    {
        $employees = Employee::all();
        return view ('employees.index')->with('employees', $employees);
    }
    public function create()
    {
        return view('employees.create');
    }
    public function store(Request $request)
    {
        $requestData = $request->all();
        $fileName = time().$request->file('photo')->getClientOriginalName();
        $path = $request->file('photo')->storeAs('images', $fileName, 'public');
        $requestData["photo"] = '/storage/'.$path;
        Employee::create($requestData);
        return redirect('employee')->with('flash_message', 'Employee Addedd!');
    }
}
Routes
Pages are Manage through routes. If you are crud system simple you can add it the routes one line look like this
Route::resource(‘/employee’, EmployeeController::class);
You have to add the ControllerNameSpace
use App\Http\Controllers\EmployeeController;
<?php

use Illuminate\Support\Facades\Route;
use App\Http\Controllers\EmployeeController;

Route::get('/', function () {
    return view('welcome');
});
Route::resource("/employee", EmployeeController::class);
Link Storage folder to public dir
php artisan storage:link